Sharing and recieving files and folders
Further Information
You can find further information in our articles about sharing!Sharing Files and Folders
Notice: Since Nextcloud version V31, sharing content has been handled differently. The areas for sharing with users of the same institution are located in the upper section, while the lower section is used for users of other higher education institutions and guests. Unfortunately, Nextcloud has deactivated the address book search in the lower section. We currently cannot change this. Therefore, you need to search for the Federated Cloud ID here.
Sharing Files & Folders with Other Users
Sharing with Other Users
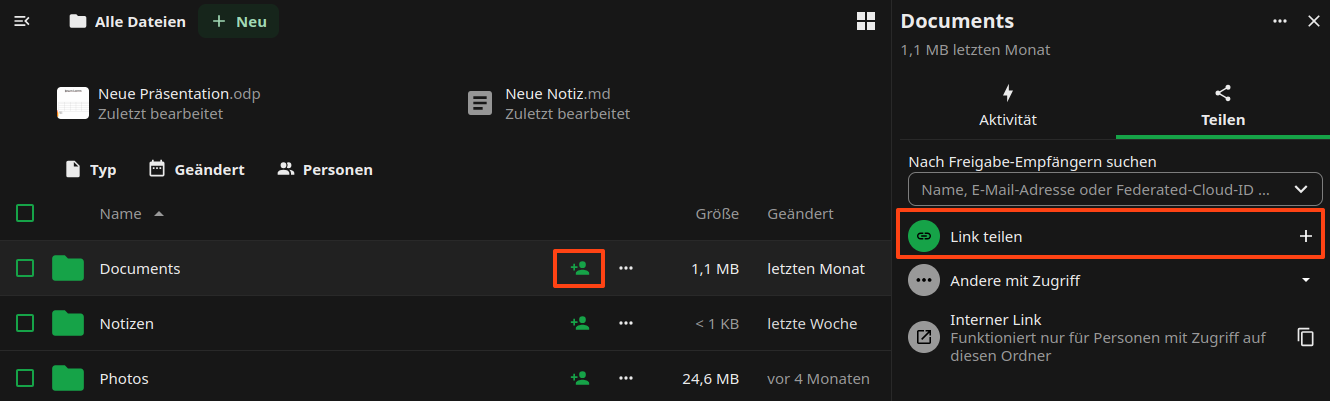
- Click the head icon next to the item you want to share. You can share both, individual files and folders.
- The share menu opens on the right.
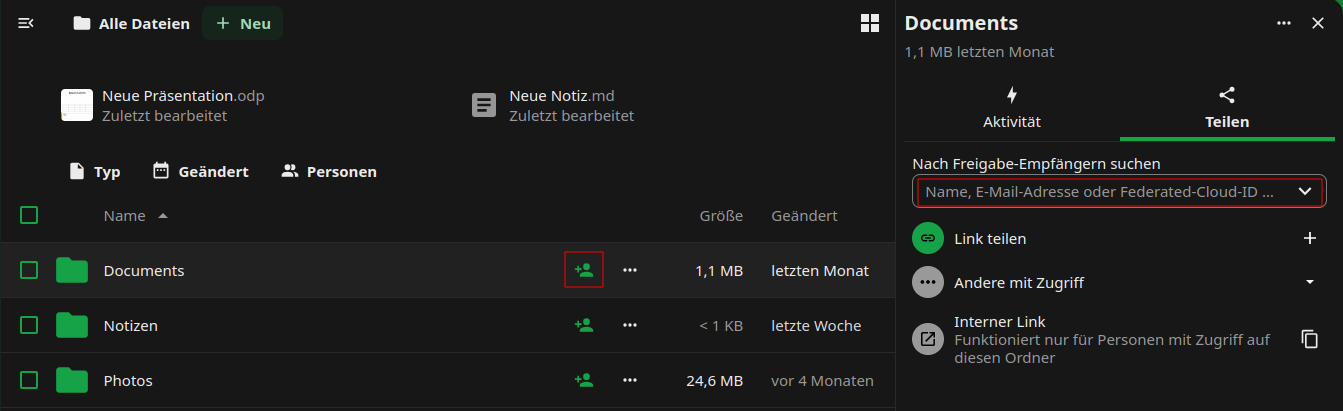
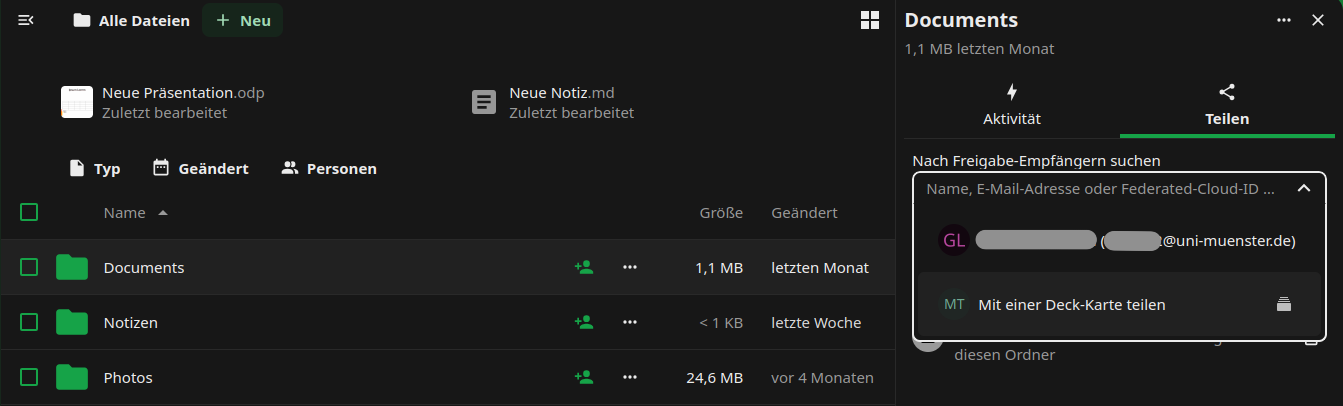
- In the text box, enter the name of the person with whom you wish to share your data, following the principle “last name, first name”. Select the person from the list that appears.
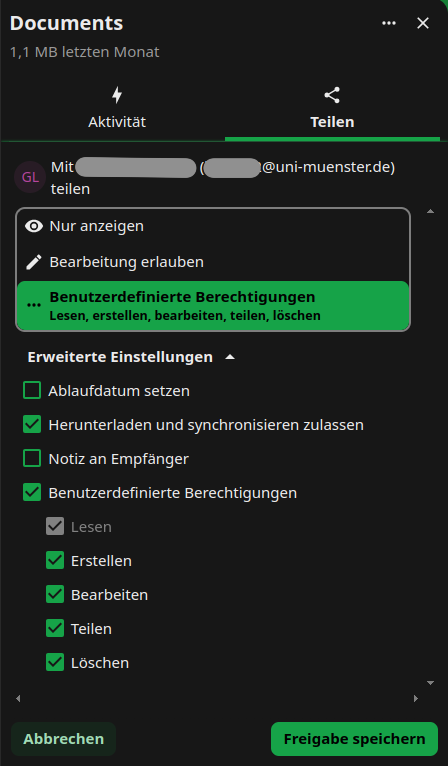
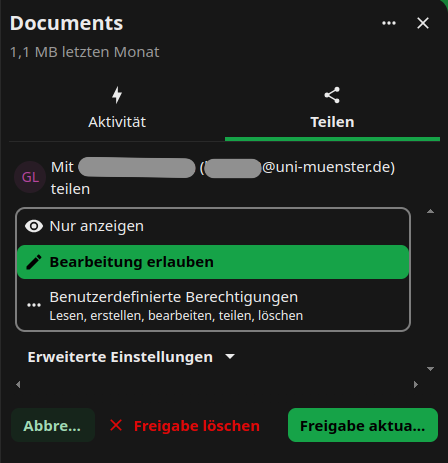
- Decide what rights the person will have regarding the file or folder you shared. The write permissions include “create”, “edit” and “delete”. We recommend that you disable the sharing permission (“can share”). You can change the rights at any time.
- You can delete the share by clicking on […] icon next to the person’s name and choose option “delete share”.
Sharing Files & Folders via Link
Sharing via Link
- Click the head icon next to the item you want to share. You can share both individual files and folders.
- The share menu opens on the right.
- Click on the “+” symbol near “Public Links” this would create a public link.
- Decide which permissions people who access the file or folder via the link will have. Click on […] on symbol, choose the “Customize link” option, update the relevant permissions and approve by clicking “update share link”.
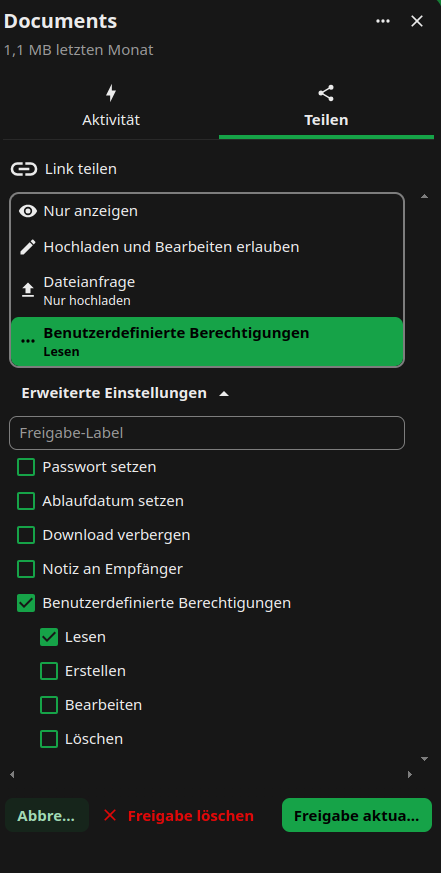
Optional: Set a password to protect your data from unauthorised access.
Optional: Set an expiry date to protect your data from unauthorised access.
Adding Files & Folders Shared by Link
If other users share data with you via link, you can add the shared files/folders to your own sciebo account.
- Open the link and, if necessary, enter the password with which the link is protected.
- Click on […]-Symbol.
- Enter your sciebo-ID with the server address (e.g. user1@instance.de@instance.sciebo.de) in the “Hinfpgen zu Ihrer Nextcloud” input field and click on the arrow to the right of the field.

- You will be forwarded to the sciebo login page. Log in with your sciebo identification.
- The link is now displayed as “Remote Sharing” in a pop-up window. You may need to re-enter the password that protects the link. Then confirm the receipt by clicking on “Accept”.
- The files/folders will now be added to your account.
Receive Files & Folders via Link (file drop)
If you need to receive large files from external sources, you can create a “file drop” for this purpose.
- Create a new folder.
- Click on the header icon next to the directory where the files are to be uploaded.
- The share menu opens on the right.
- Click on the “+” symbol near “Public Links” this would create a public link.
- Click on […] and choose the “Customize link” option, in the opened window choose the “File request/Upload only” option, update the relevant permissions and approve by clicking “update share link”.
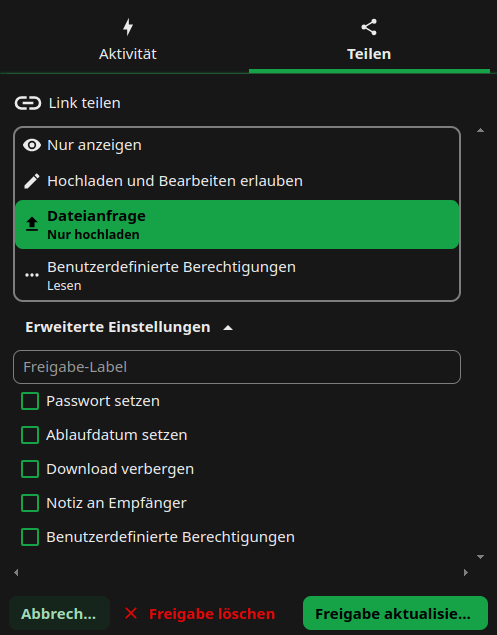
Optional: Set a password to protect the folder from unauthorised uploads.
Optional: Set an expiry date to protect the folder from unauthorised access.
please notice:
- If you want to share large files or folders with people that are not in your institution, the synchronisation can be quite slow, because the files need to be transferred.
- Within the same institution, this approach is not recommended, as it also creates an external share (remote share) which does not work as reliably as a direct user-to-user share within an institution.