With the web interface, you can access your data anywhere via web browser. No matter whether you want to upload, download,
edit, delete or share data or whether you want to work on a file with several people at the same time - in the web
interface, you can use all the advantages of sciebo.
1 - Deleting & Restoring Files & Folders
Files and folders that you no longer need should be deleted to make more storage space available again. If you have accidentally deleted data, you can easily restore it within a week.
Deleting Files & Folders
Deleted files/folders remain in your trash bin for at least 30 days before they are permanently deleted. You can view the trash bin under “Deleted files” in the left menu.
Delete Individual Files/Folders
Click on the three dots next to the file/folder and select “Delete file/folder”.
The file or folder is moved to the trash.
Delete Several Files/Folders
Select the files/folders you want to delete by checking the boxes on the file/folder icon.
Click on the three dots that appear in the top menu bar and select “Delete”.
The files/folders are moved to the trash.
Removing Files & Folders Shared with You
If you no longer need a file/folder that has been shared with you, you can delete the share. The file/folder is removed from your sciebo account, but remains with the owner.
Click on the three dots next to the file/folder and select “Leave this share”.
The file/folder is removed from your sciebo account. It is not moved to the deleted files to get it again; the person would need to reshare it with you.
Restoring Files & Folders
Restore Individual Files/Folders
Open the trash bin by clicking “Deleted Files” in the left menu.
Click on the “Restore” icon next to the file/folder you want to restore.
The file/folder will be restored to the location where it was last saved.
Restore Several Files/Folders
Open the trash bin by clicking “Deleted Files” in the left menu.
Select the files/folders you want to restore by checking the boxes on the file/folder icon.
Click on the “Restore” icon that appears in the top menu bar.
The files/folders will be restored to the location where they were last saved.
2 - Editing Files (Simultaneously)
Learn how to edit your files - even collaboratively!
Editing Files
Click on the file name to open the editor. Depending on the type of document (text, presentation or spreadsheet) you will be taken directly to the appropriate editor.
Edit the file. General information on how to use the editor can be found under “File > Help”. Changes are automatically saved temporarily.
To return to the file overview, click on the folder symbol in the upper menu bar of the editor. The file will be saved again.
Editing Files Simultaneously
In the web interface, you can edit files together with other sciebo users of your institution. The prerequisite is that
the file is shared with all of them and that the appropriate editing rights have been assigned. Simultaneous editing offers
simultaneous access to text, presentation and spreadsheet documents, a review function (visual marking of edited elements),
a comment function, and a chat function.
The number of users currently editing the document is displayed at the top right of the control bar. Click on the user symbol to find out the names of the persons editing the document.
Notes on Simultaneous Editing
Unfortunately, simultaneous editing is currently not possible with persons from other universities or guest accounts.
A co-edited document is only synchronised via the client when you close the editor.
Simultaneous editing may only be carried out via the web interface. Parallel editing via the desktop client leads to conflicts when saving.
The undo/redo function cannot be used.
3 - Further Functionality
More Sciebo usecases - What do the elements in the header mean?
In the header of the webinterface of Sciebo you can find different. Here you can find informormation on each of these apps.
Files
Here you can manage your files. Further information you can find here:
Here you can see the activity of your Sciebo-Account. The list of file changes is generated automatically.
Contacts
Here you can create and manage personal contancts.
Calendar
Add envents to this calandar. You can import calander data. If you are already using a digital calendar, it can usually export its calendar data. The file that is created in this way can be imported into the calendar app.
Notes
In the Notes app you can format and organise your thoughts with Markdown, a popular and simple rich text format.
Deck
Deck is a visual project management tool. For further information click here
Announcements
Here you can find important announcements from the sciebo-team.
Polls
Create and share polls. For further information click here
Forms
Create and share forms. Here you can create very intrecate forms and share them even with people that are not sciebo-users!
Help
Here you get to this page.
Tasks
Manage your todos in this application!
Overleaf
Sciebo hosts its own overleaf instance. For more information click here
4 - Organising Files and Folders
Learn how to organize and manage your files in the webinterface.
Creating, Renaming & Moving Files & Folders
Creating Files & Folders
Click on the “+ New” symbol in the upper menu bar.
Select “New folder” or the type of file you want to create.
Name the file or folder.
Press the Enter key. A new file or folder is created. (New files are opened directly in edit mode.)
Renaming Files & Folders
Click on the three dots next to the file and select “Rename”.
Enter a new name and press the Enter key.
Moving Files & Folders
Move Individual Files/Folders
Click on the three dots next to the file or folder you want to move and select “Move of Copy”.
In the opened window, select the folder to which the file should be moved and click on it.
Click on the “Move to …” button that appears at the bottom of the window. The file/folder is now inserted.
Move Several Files/Folders
Select the files/folders you want to move by checking the boxes on the corresponding icons.
Click on the “Move of copy” icon that appears in the top menu bar.
In the opened window, select the folder to which the file should be moved and click on it.
Click on the “Move to …” button that appears at the bottom of the window. The files/folders are now inserted.
Up- & Downloading Files & Folders
Uploading Files
Select “Upload files” under “+ New”.
Select one or more files and click “Open”. Alternatively, you can drag and drop the file(s) from your PC into the browser window.
The loading bar shows the upload progress.
Uploading Folders
Select “Upload folders” under “+ New”.
Select one or more folders and click “Open”. Alternatively, you can drag and drop the folder(s) from your PC into the browser window.
The loading bar shows the upload progress.
Downloading Files & Folders
Download Individual Files/Folders
Click on the three dots next to the file/folder and select “Download”.
Decide where the file/folder will be saved on your computer.
When saving folders, a zip file is created which you must unzip before opening.
Download Several Files/Folders
Select the files/folders you want to download by checking the boxes on the folder/file icon.
Click on the “Download” icon that appears in the top menu bar.
The download will be a zip file.
5 - Server List
List of universities and server URLs
List of Universities
Using the URLs from this list, you will gain access to the Sciebo web interface of your respective university.
Please use only your Sciebo-ID for login.
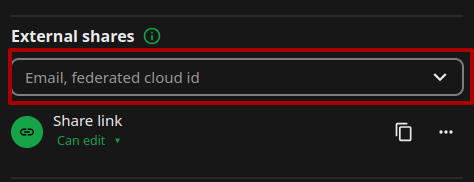
Notice: Since Nextcloud version V31, sharing content has been handled differently. The areas for sharing with users of the same institution are located
in the upper section, while the lower section is used for users of other higher education institutions and guests. Unfortunately, Nextcloud has deactivated
the address book search in the lower section. We currently cannot change this. Therefore, you need to search for the Federated Cloud ID here.
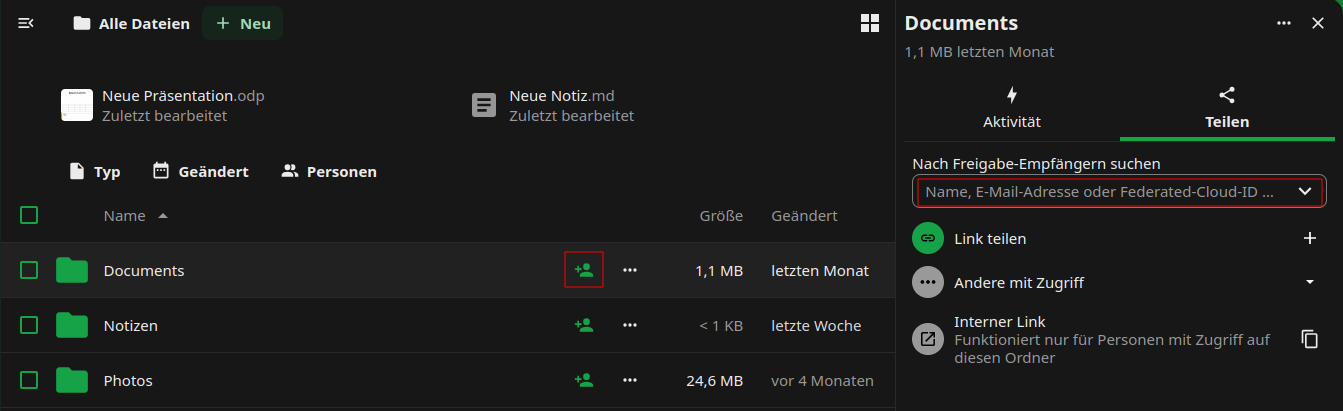
Sharing Files & Folders with Other Users
Sharing with Other Users
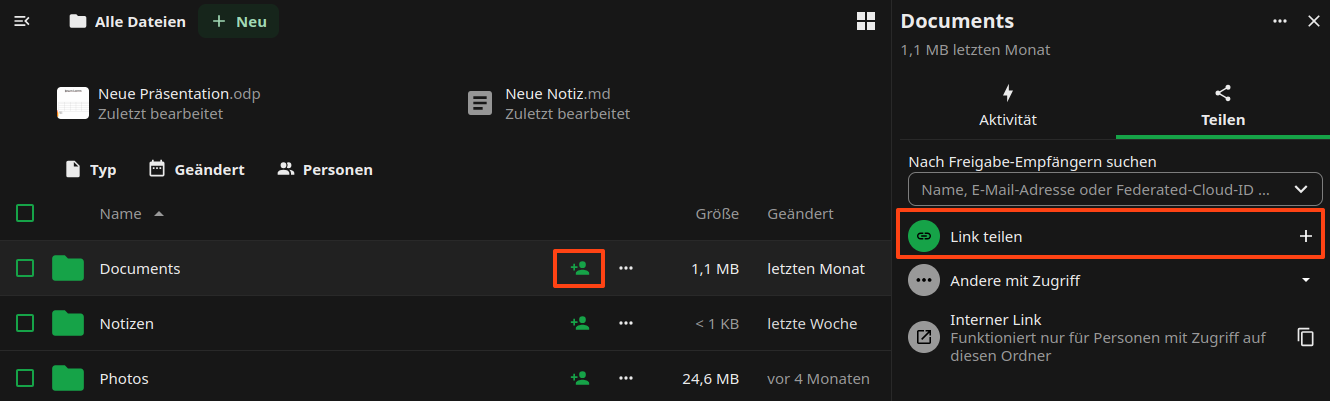
Click the head icon next to the item you want to share. You can share both, individual files and folders.
The share menu opens on the right.
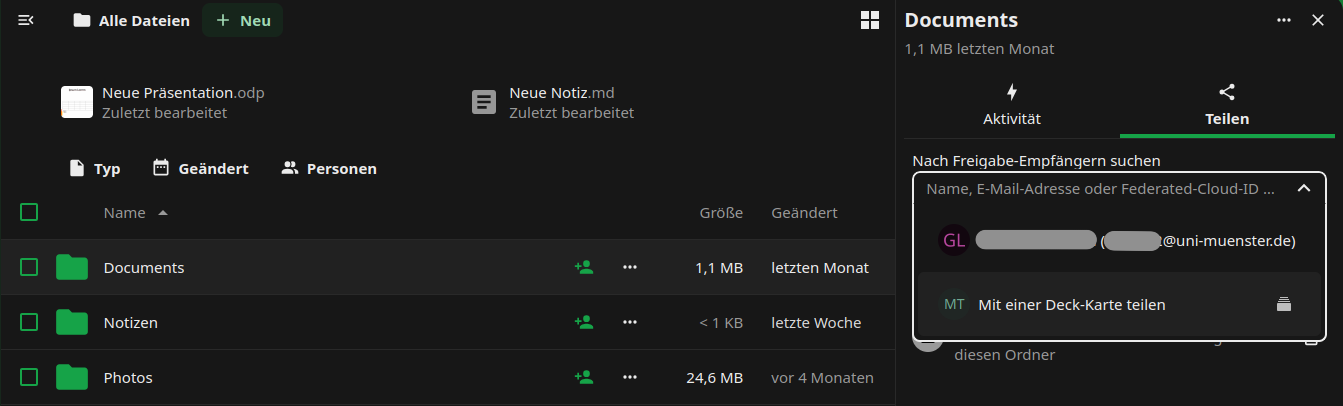
In the text box “Internal shares”, enter the name of the person with whom you wish to share your data, following the principle “last name, first name”. Select the person from the list that appears.
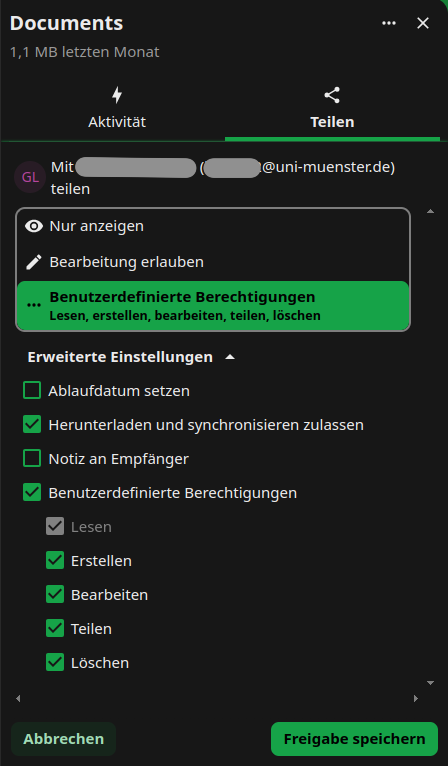
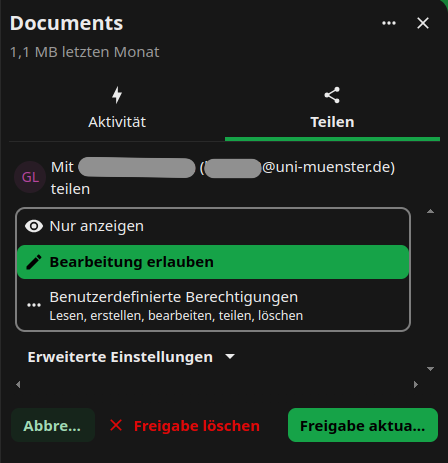
Decide what rights the person will have regarding the file or folder you shared. The write permissions include “create”, “edit” and “delete”. We recommend that you disable the sharing permission (“can share”). You can change the rights at any time.
You can delete the share by clicking on […] icon next to the person’s name and choose option “delete share”.
Sharing Files & Folders via Email
Click the head icon next to the item you want to share. You can share both individual files and folders.
The share menu opens on the right.
In the text box “External shares”, enter the email of the person with whom you wish to share your data.
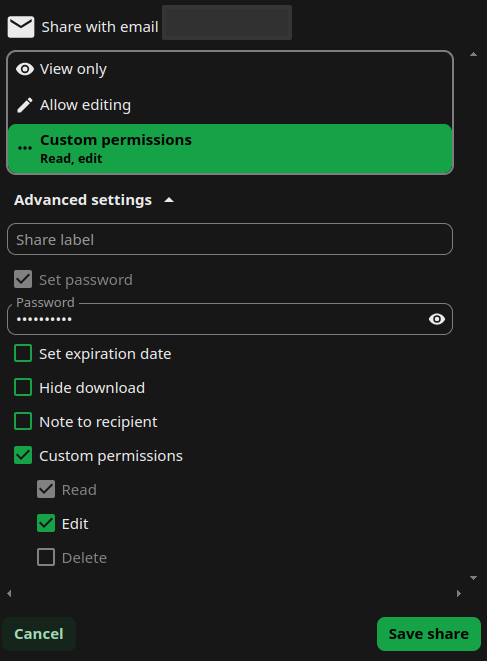
Decide what rights the person will have regarding the file or folder you shared.
You can delete the share by clicking on […] icon next to the person’s email and choose option “Unshare”.
Sharing Files & Folders via Link
Sharing via Link
Click the head icon next to the item you want to share. You can share both individual files and folders.
The share menu opens on the right.
Click on the “+” symbol near “Public Links” this would create a public link.
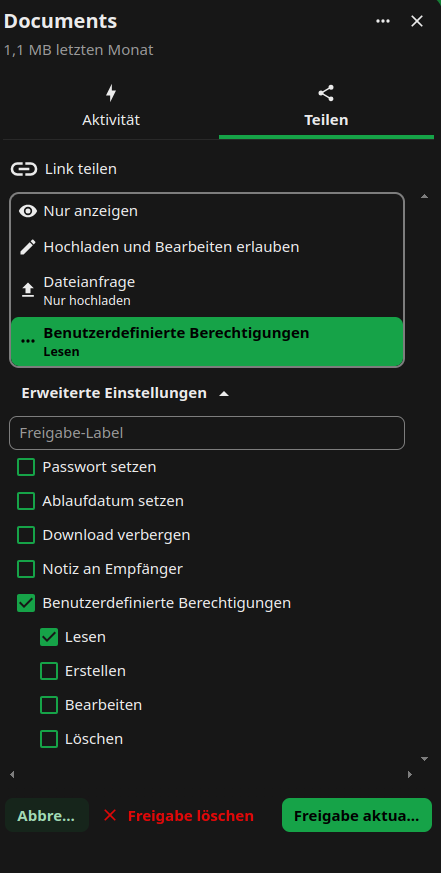
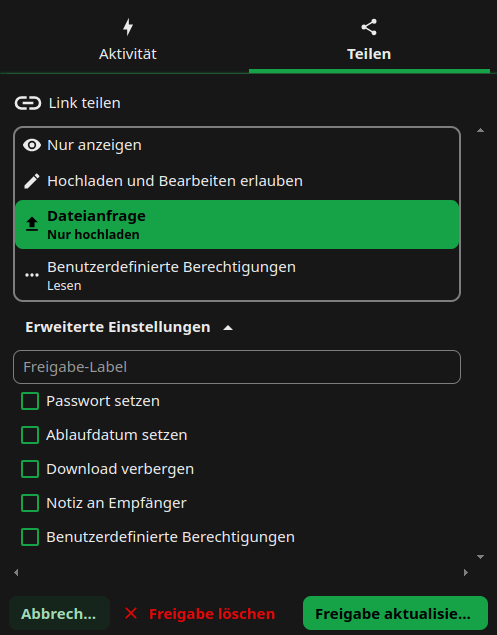
Decide which permissions people who access the file or folder via the link will have. Click on […] on symbol, choose
the “Customize link” option, update the relevant permissions and approve by clicking “update share link”.
Optional: Set a password to protect your data from unauthorised access.
Optional: Set an expiry date to protect your data from unauthorised access.
Adding Files & Folders Shared by Link
If other users share data with you via link, you can add the shared files/folders to your own sciebo account.
Open the link and, if necessary, enter the password with which the link is protected.
Click on […]-Symbol.
Enter your sciebo-ID with the server address (e.g. user1@instance.de@instance.sciebo.de) in the “Hinfpgen zu Ihrer Nextcloud” input field and click on the arrow to the right of the field.
You will be forwarded to the sciebo login page. Log in with your sciebo identification.
The link is now displayed as “Remote Sharing” in a pop-up window. You may need to re-enter the password that protects the link. Then confirm the receipt by clicking on “Accept”.
The files/folders will now be added to your account.
Receive Files & Folders via Link (file drop)
If you need to receive large files from external sources, you can create a “file drop” for this purpose.
Create a new folder.
Click on the header icon next to the directory where the files are to be uploaded.
The share menu opens on the right.
Click on the “+” symbol near “Public Links” this would create a public link.
Click on […] and choose the “Customize link” option, in the opened window choose the “File request/Upload only” option,
update the relevant permissions and approve by clicking “update share link”.
Optional: Set a password to protect the folder from unauthorised uploads.
Optional: Set an expiry date to protect the folder from unauthorised access.
please notice:
If you want to share large files or folders with people that are not in your institution, the synchronisation can be quite slow, because the files need to be transferred.
Within the same institution, this approach is not recommended, as it also creates an external share (remote share) which does not work as reliably as a direct user-to-user share within an institution.