The mobile app is ideal for viewing and sharing files on the go. You can upload, delete, and move files (e.g., photos). However, since mobile devices usually have limited storage space, your data is not automatically downloaded. A file is only saved on your device when you manually access it.
This is the multi-page printable view of this section. Click here to print.
Android App
Learn how to synchronize files on your phone with sciebo.
- 1: Android App install anc configure
- 2: Delete and recover files & folders
- 3: Create, rename, and move
- 4: Share files & folders
- 5: Upload and download
1 - Android App install anc configure
Setup
- Download the sciebo app from the Play Store or from our download page and open it.
- Select the server name of your institution. You will be redirected to the login page. Click on “Login”.
- Then enter your sciebo username (sciebo-ID@your-institution.de) and your password.
- Click on “Authorize” to grant the sciebo app access to your sciebo account.
2 - Delete and recover files & folders
Deleting Files & Folders Locally
- Tap the three dots next to the file or folder to open the context menu.
- Select the “Delete” option.
- Click the “Locally only” button to delete the file or folder from your phone. The file or folder will now only be deleted locally and will not be removed from the sciebo server.
Deleting Files & Folders
- Tap the three dots next to the file or folder to open the context menu.
- Select the “Delete” option.
- Click the “Delete” button to delete the file or folder from your sciebo account. The file or folder will now be moved to the trash.
Restoring Files & Folders
Restoring individual files/folders
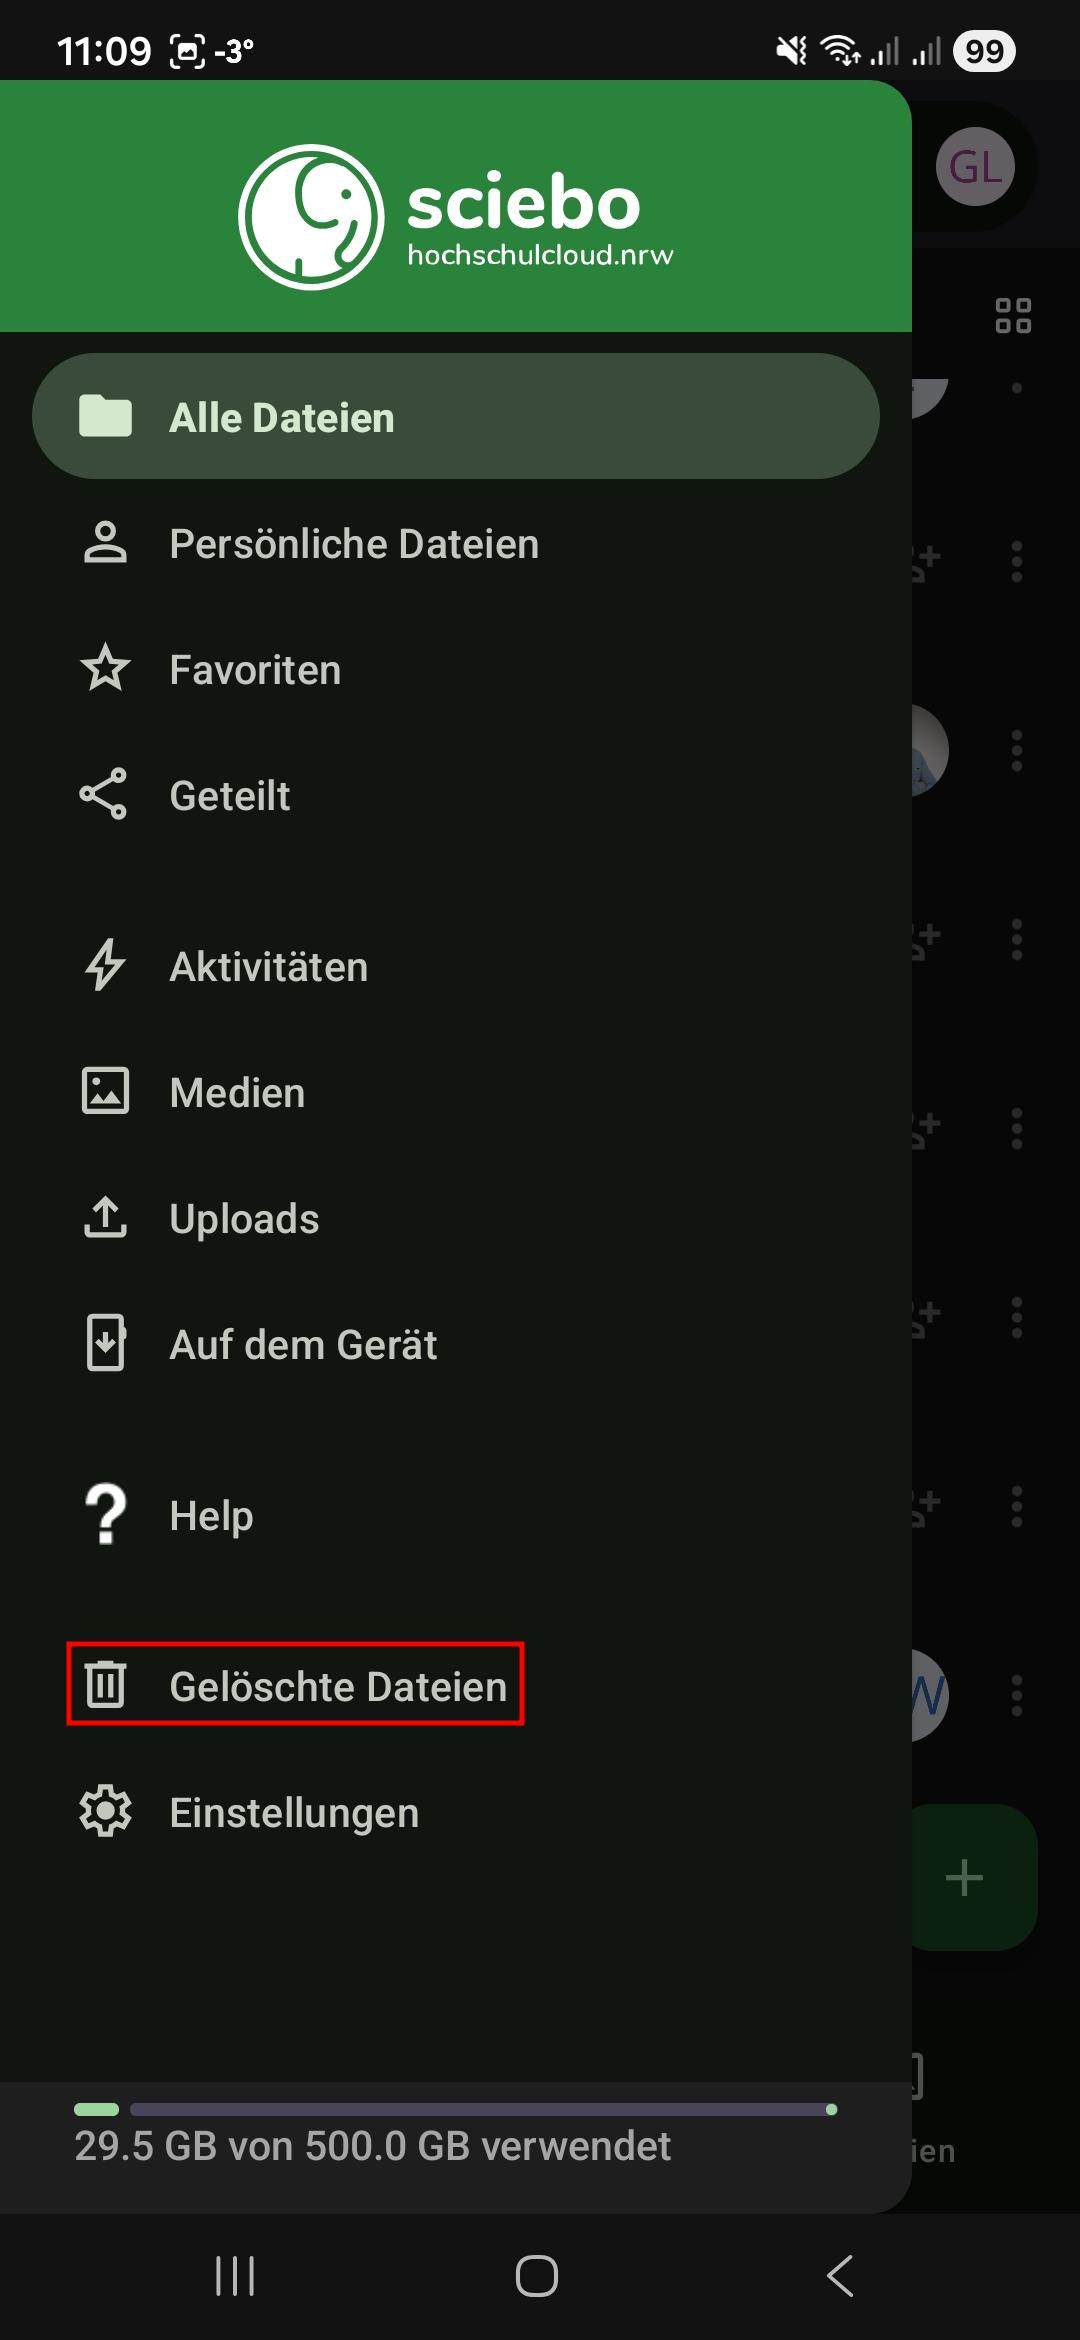
- Click on the three lines at the top left.
- Select the “Deleted files” option from the menu.
- Click the “Restore” icon next to the file or folder you want to restore.
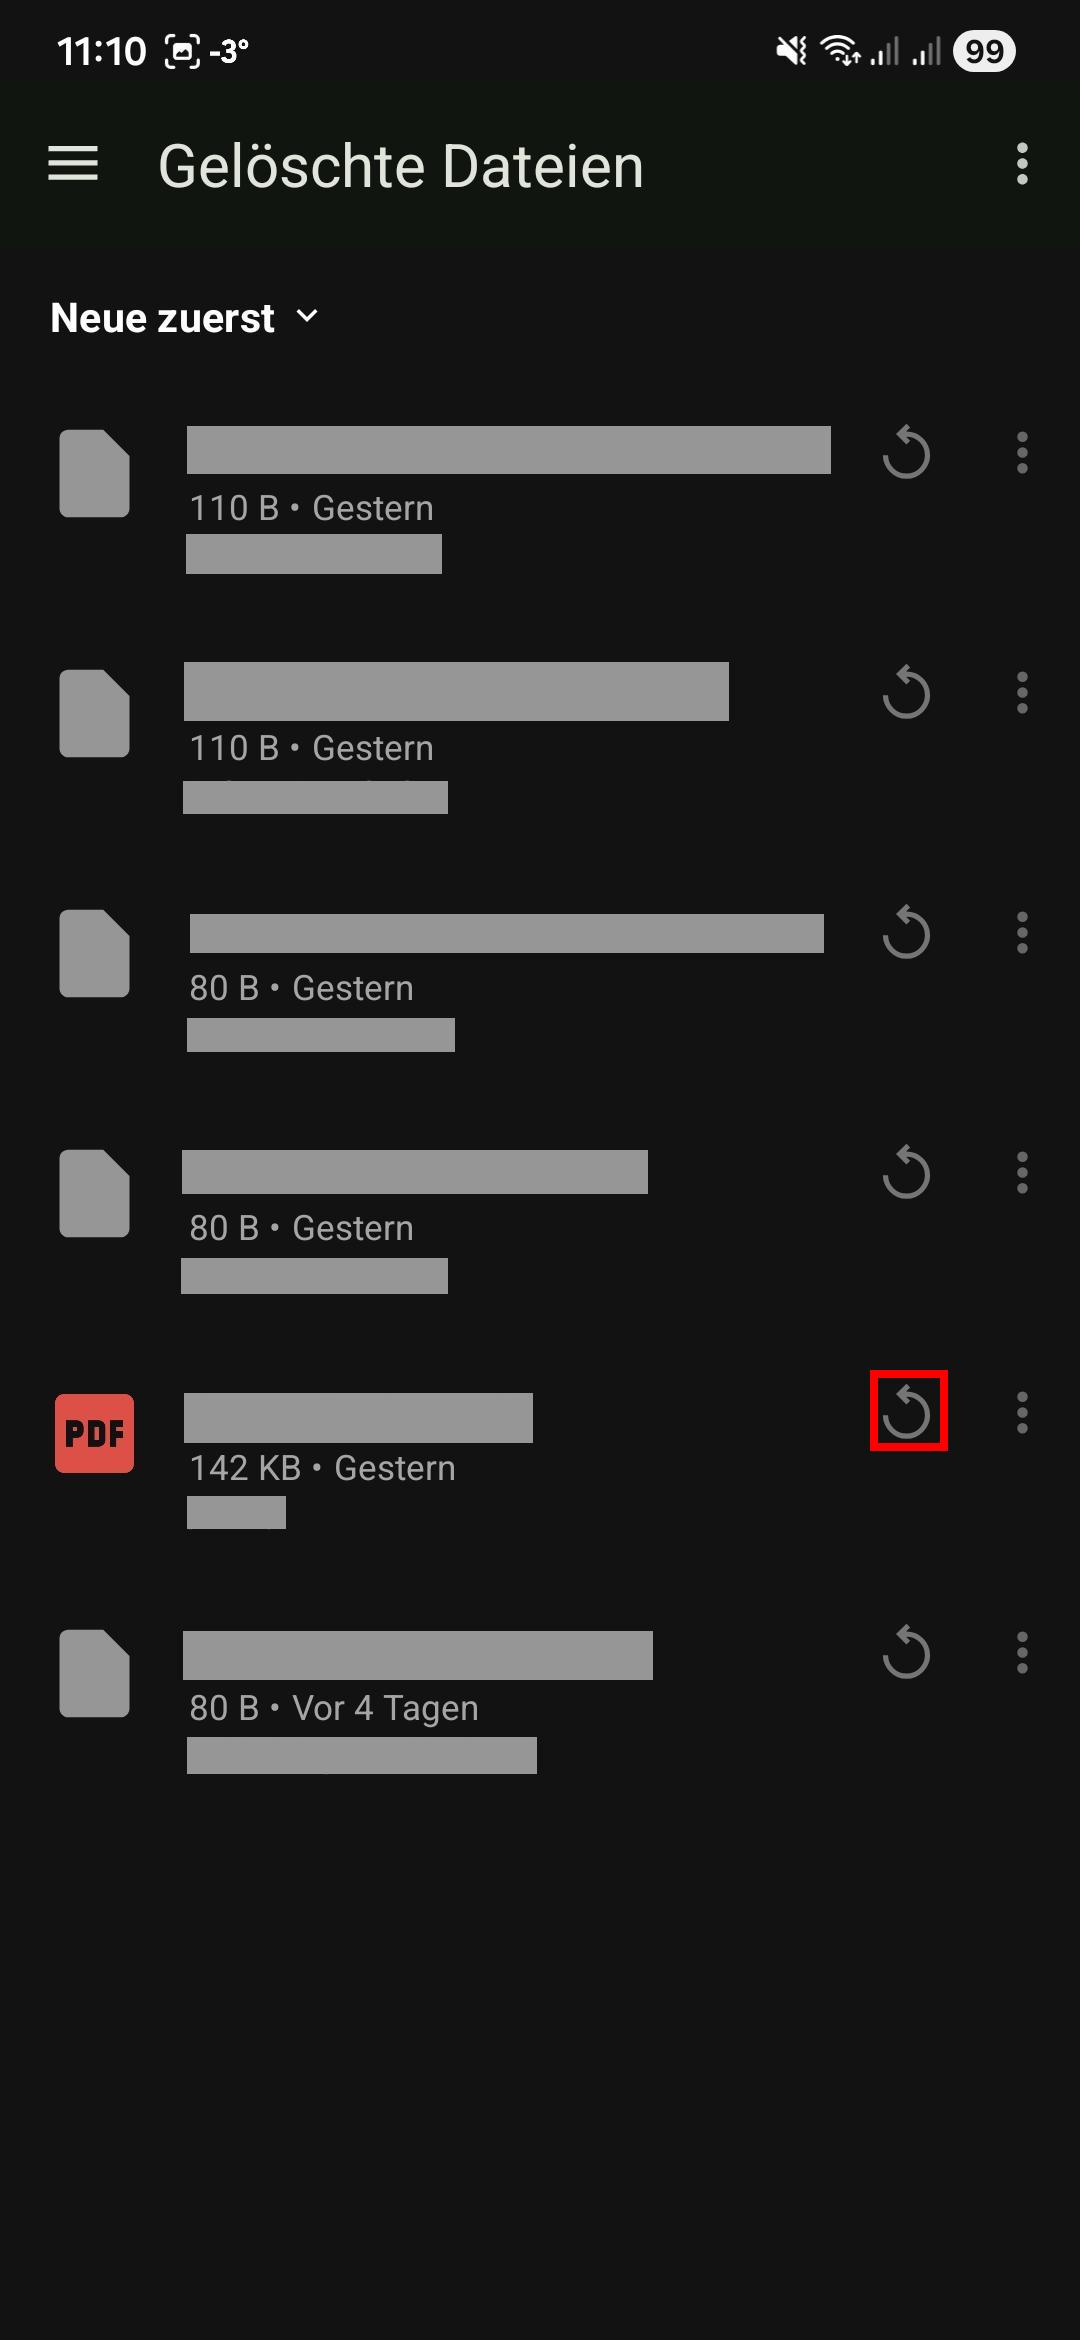
- The file or folder will be restored to the location where it was last saved.
3 - Create, rename, and move
In the sciebo app, you can create new folders as well as rename and move files and folders.
Creating Files & Folders
- Select the folder in which you want to create the new folder.
- Tap the “+” button at the bottom right. It opens the context menu.
- Tap the menu “New folder” entry.
- Name the folder.
- Tap on “Create”. A new folder is created.
Renaming Files & Folders
- Tap on tree dots next to the file or folder you want to rename. It opens the context menu.
- Select “Rename”.
- Enter a new name.
- Tap “Rename”.
Moving Files & Folders
- Tap on tree dots next to the file or folder you want to move. It opens the context menu.
- Select “Move or copy”. This takes you to the top folder level.
- Select the folder to which you want to move the file or folder.

- Tap “Move” in the bottom menu bar to move the file or folder.
4 - Share files & folders
Sharing with Other Users
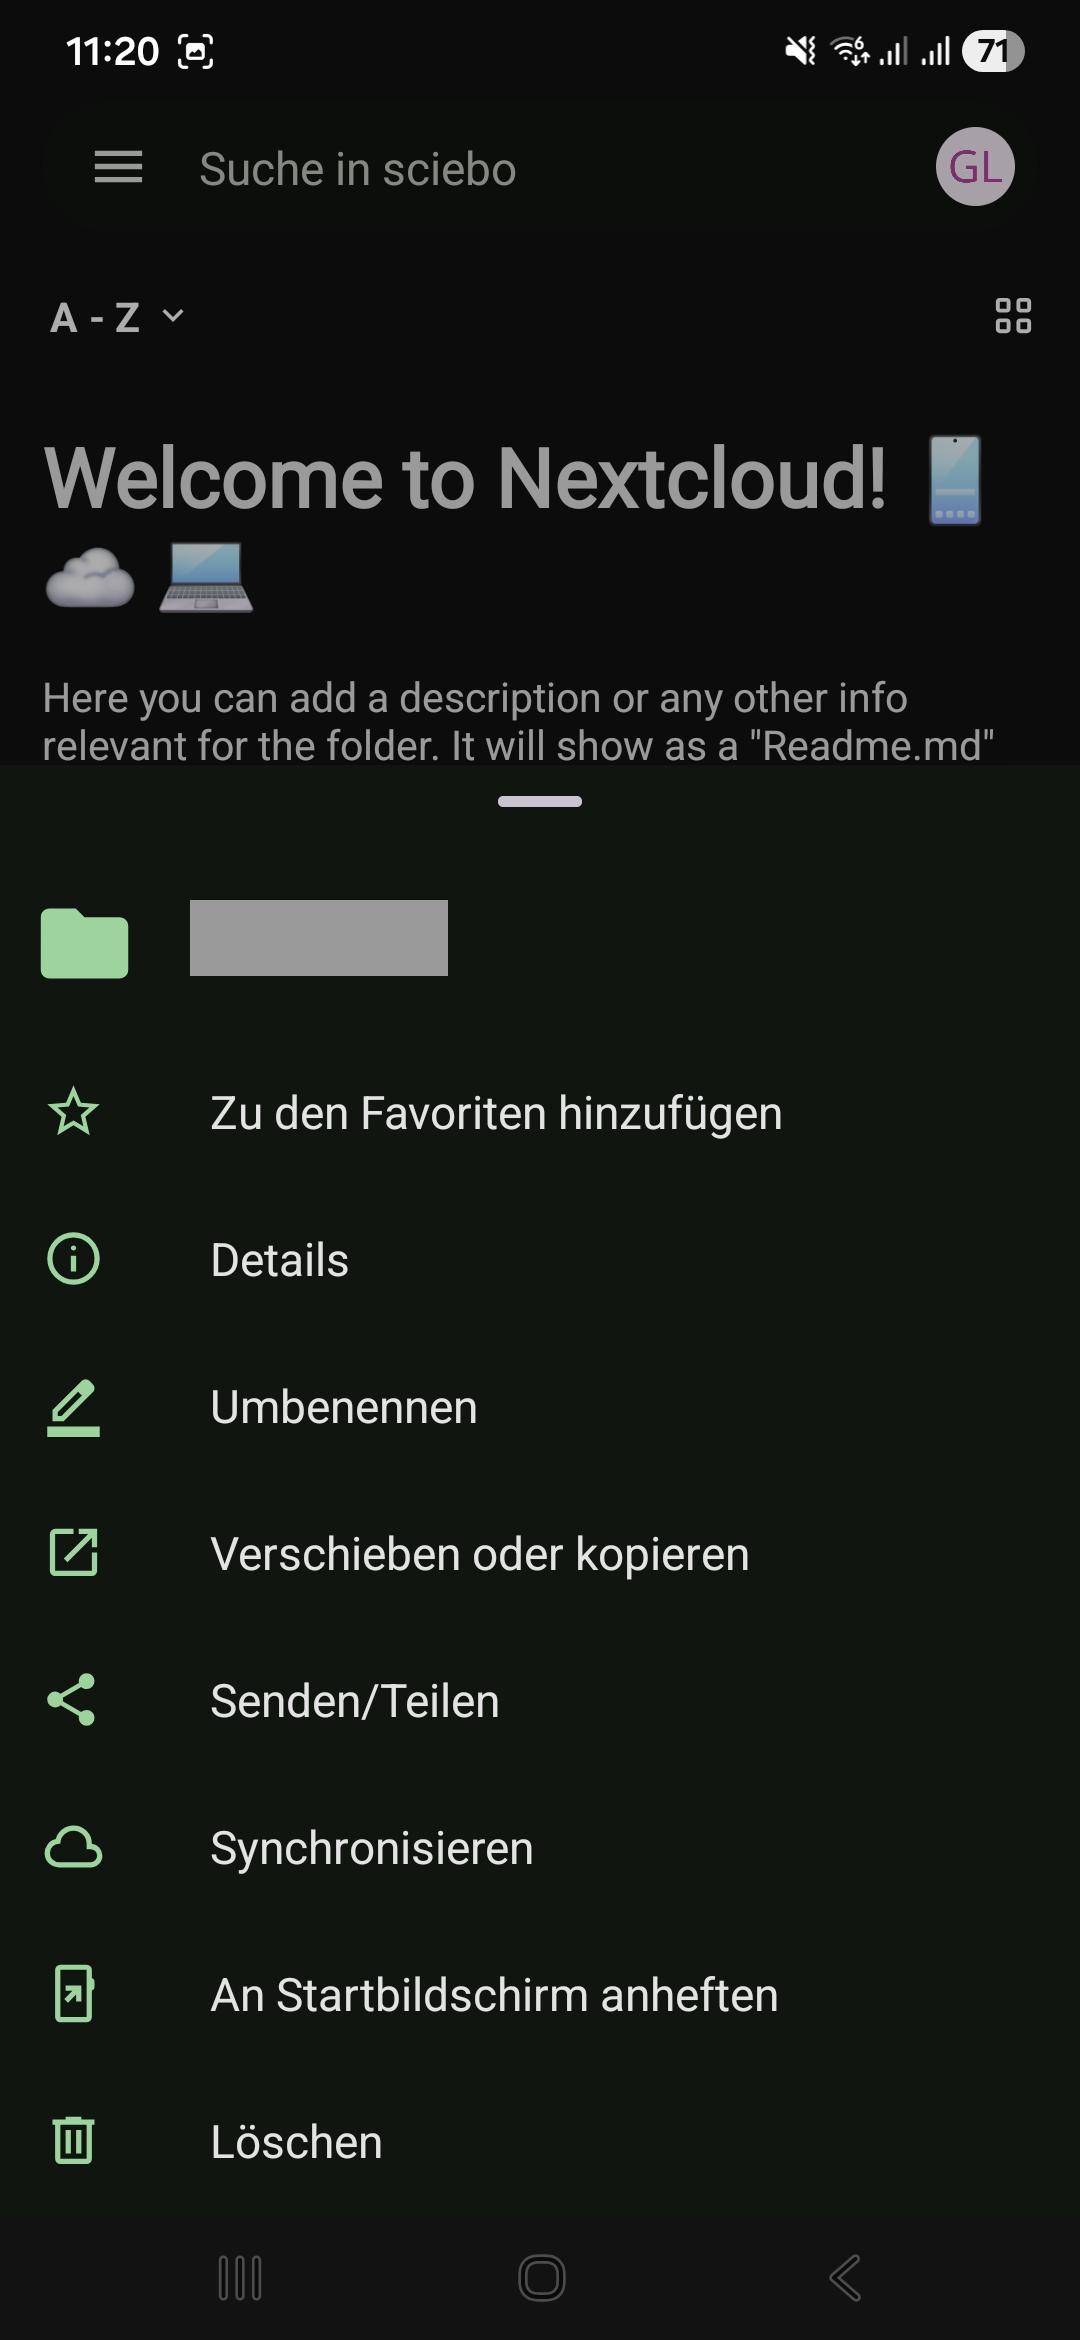
- Tap the three dots next to the file or folder to open the context menu.
- Tap the “Send/Share” menu entry.
- Tap the “Share” button.
- Enter the name of the desired user in the format “Last Name, First Name” into the “Add user or teams” field.
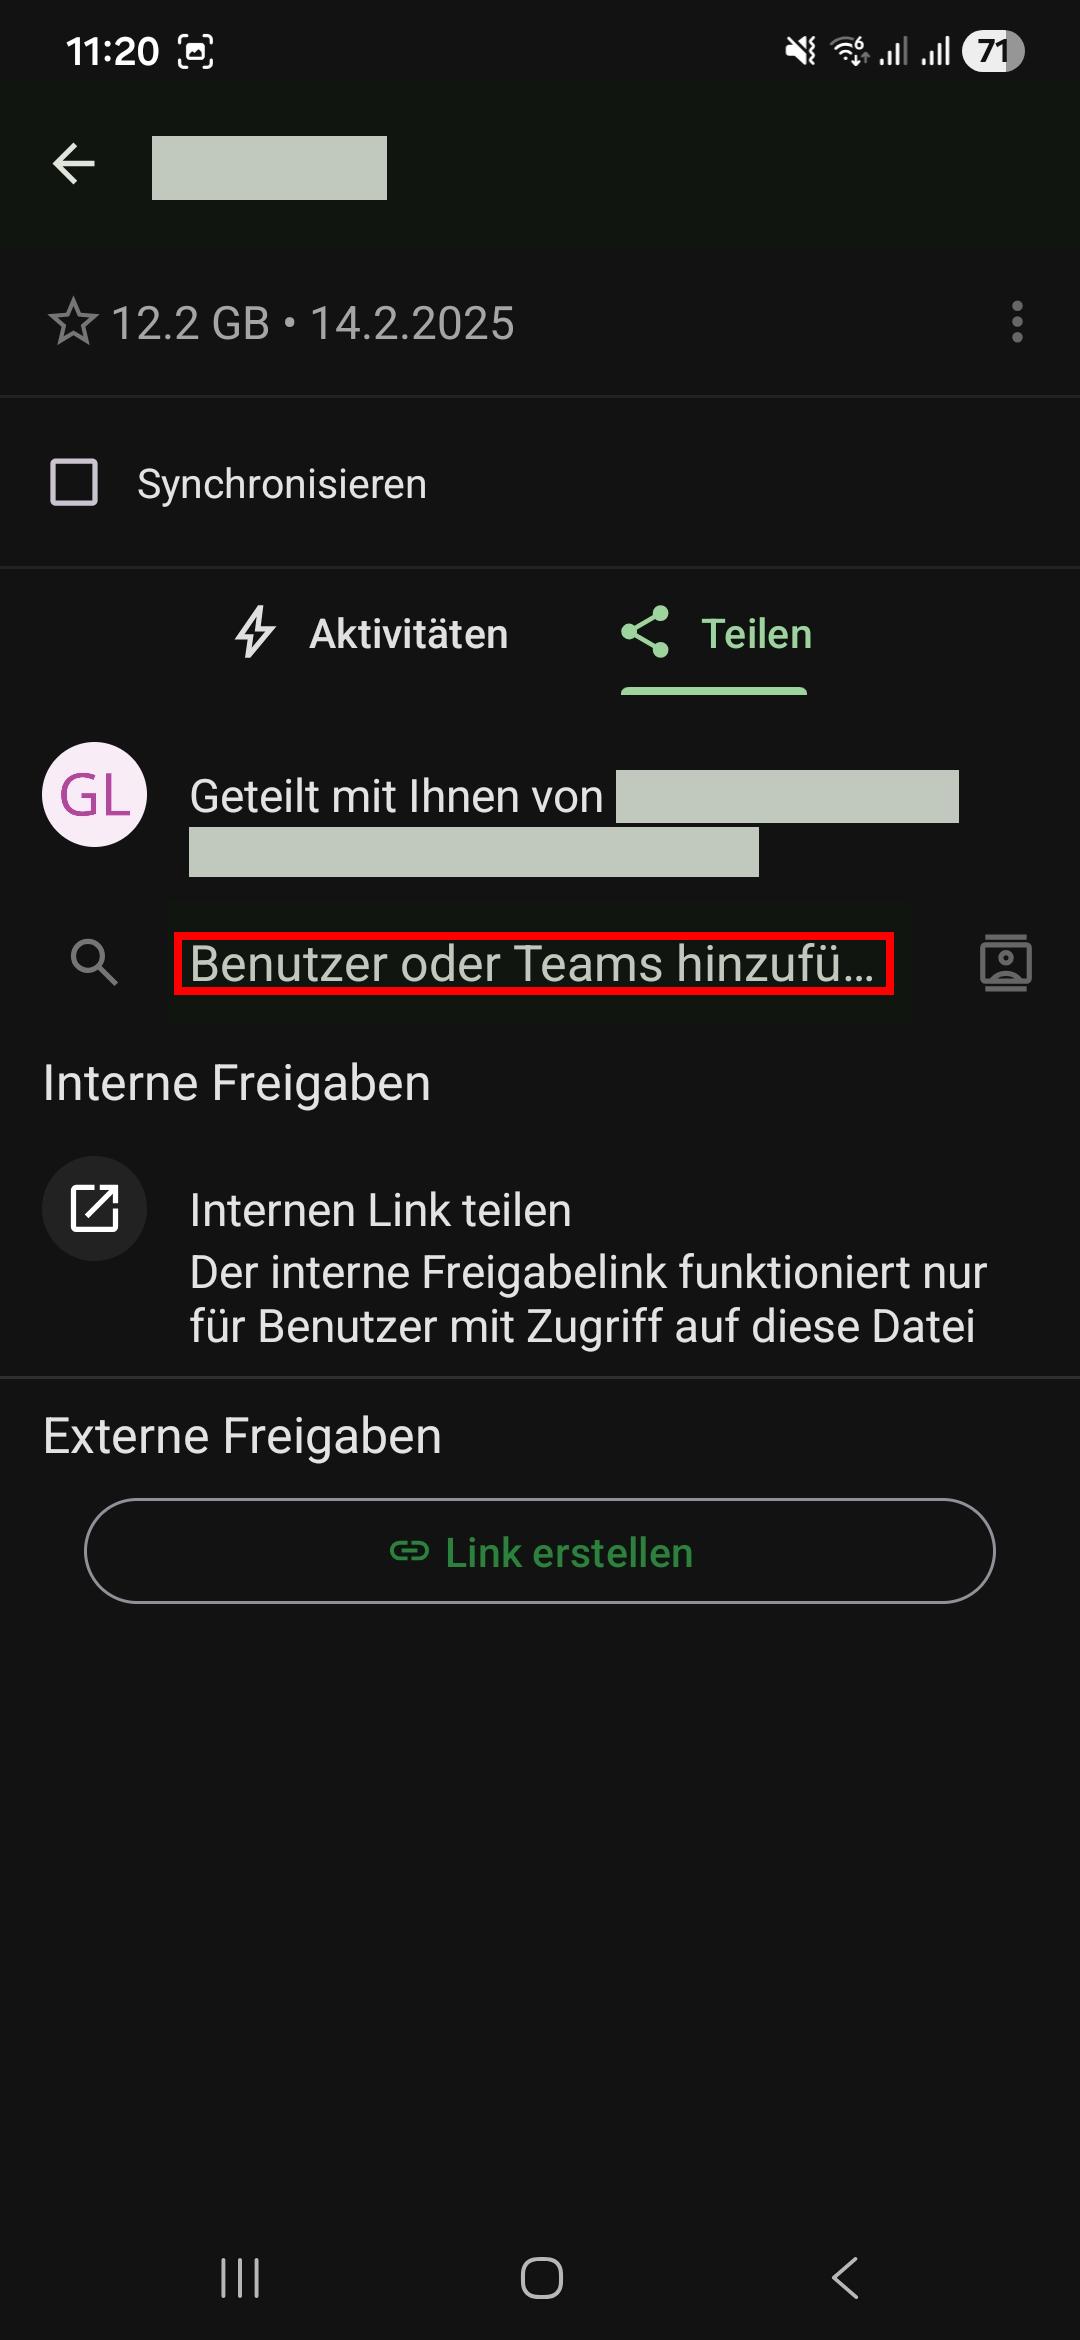
- Set the person’s editing rights. Adjust the rights as needed. Click “Next”.

- Close the sharing menu by tapping the arrow in the upper menu bar.
You can see which people and groups a file or folder has been shared with at any time by calling up the sharing menu again. There you will find a corresponding list in which you can also manage editing rights and delete shares.
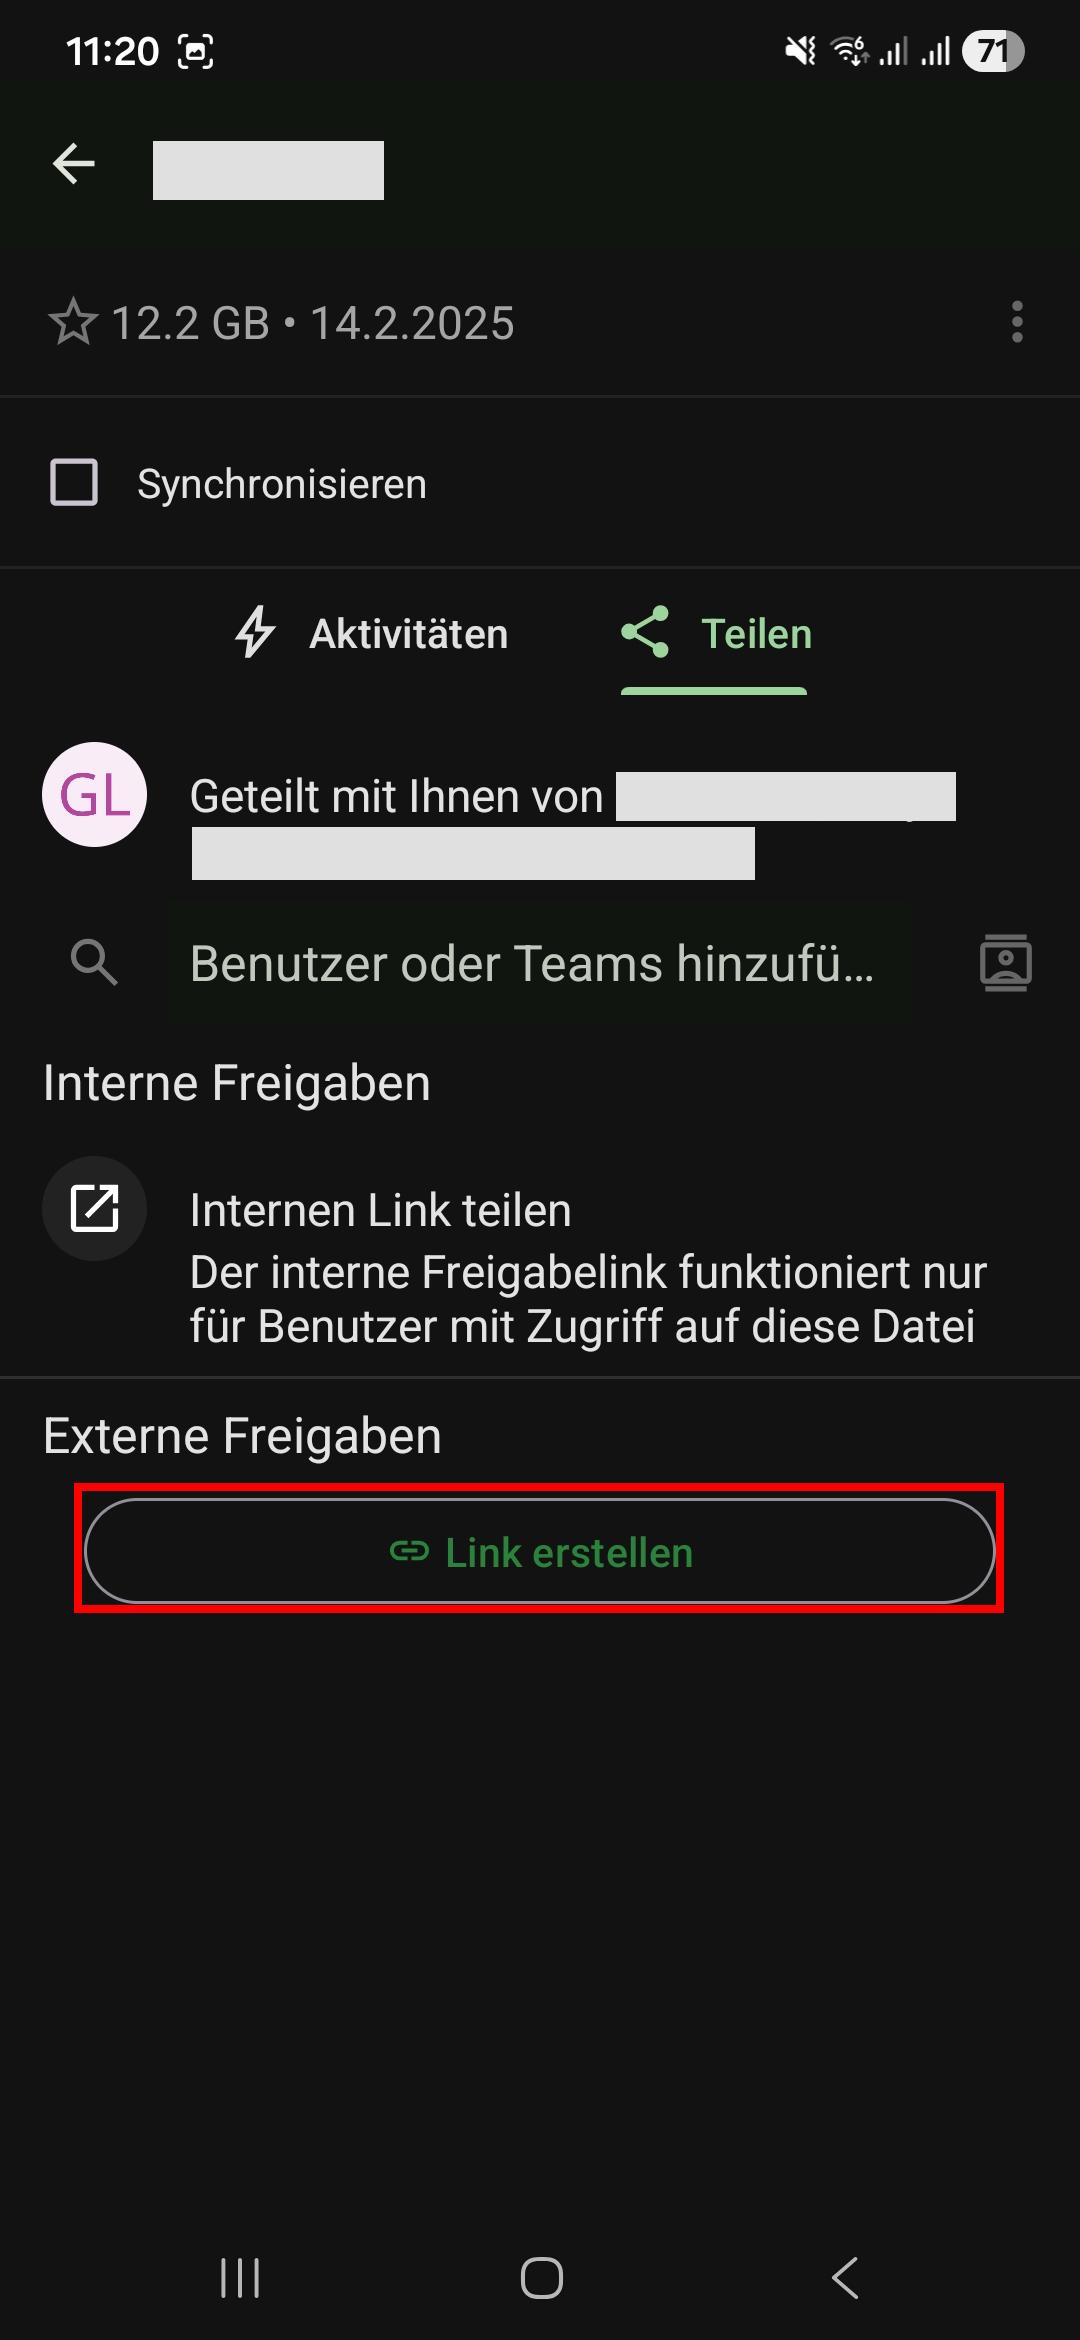
Sharing via Link
- Tap the three dots next to the file or folder to open the context menu.
- Tap the “Send/Share” menu entry.
- Tap the “Share” button.
- Tap the “Create link” button. A link will be created.
- Adjust the editing rights by tapping the three-dot icon next to the link and selecting “Settings”.

- Optional: Change the name of the link.
- Optional: Set a password to protect your data from unauthorized access.
- Optional: Set an expiration date to protect your data from unauthorized access.
- Tap “Share and copy link”.
- Close the sharing menu by tapping the arrow in the upper menu bar.
5 - Upload and download
Upload and download photo and video files easily via the sciebo app.
Uploading Files
- Select the folder where you want to upload the file(s).
- Tap the “+” button at the bottom right. Two new buttons appear.
- Tap the button with the “Upload” symbol.
- Select “Files”. (You may now have to confirm that sciebo is allowed to access your photos/videos. The option “Allow access to all photos” is particularly uncomplicated. However, you can also restrict access to certain photos/videos via “Select photos…”).
- Select the desired file(s) and tap on “Select”. The files will now be uploaded to the sciebo server.
Downloading Files & Folders
- Tap the file or folder you want to download with your finger for a moment to select it.
- Tap the “download” symbol in the upper menu bar. The file or folder is now saved locally on your device. Downloaded items are marked in the app with a small green circle with a white “download” symbol.
Note: If you want to delete downloaded data locally, select the file or folder again and tap on the three dots in the upper menu bar. Select “Delete” and then “Local only”. The file remains in sciebo, but no longer takes up space on your device.