This is the multi-page printable view of this section. Click here to print.
Apps
- 1: Connecting the *Cloud - FileLink with Thunderbird
- 2: Fill file drop with scripts
- 3: Forms
- 4: Joplin
- 5: Obsidian
- 6: Office Integrations
- 7: Overleaf
- 8: Polls
- 9: Project management with deck
1 - Connecting the *Cloud - FileLink with Thunderbird
If you use the Thunderbird email programme with the *cloud - FileLink extension, you can upload large email attachments to Sciebo and then just send the download link.
Installation of the Thunderbird
Follow the download link to download the suitable file for your operating system, then run the file and follow the instructions for installation.
Installation of the *cloud- FileLink
- Go to
Thunderbird -> Settings -> Composition -> Attachments -> Find more providers...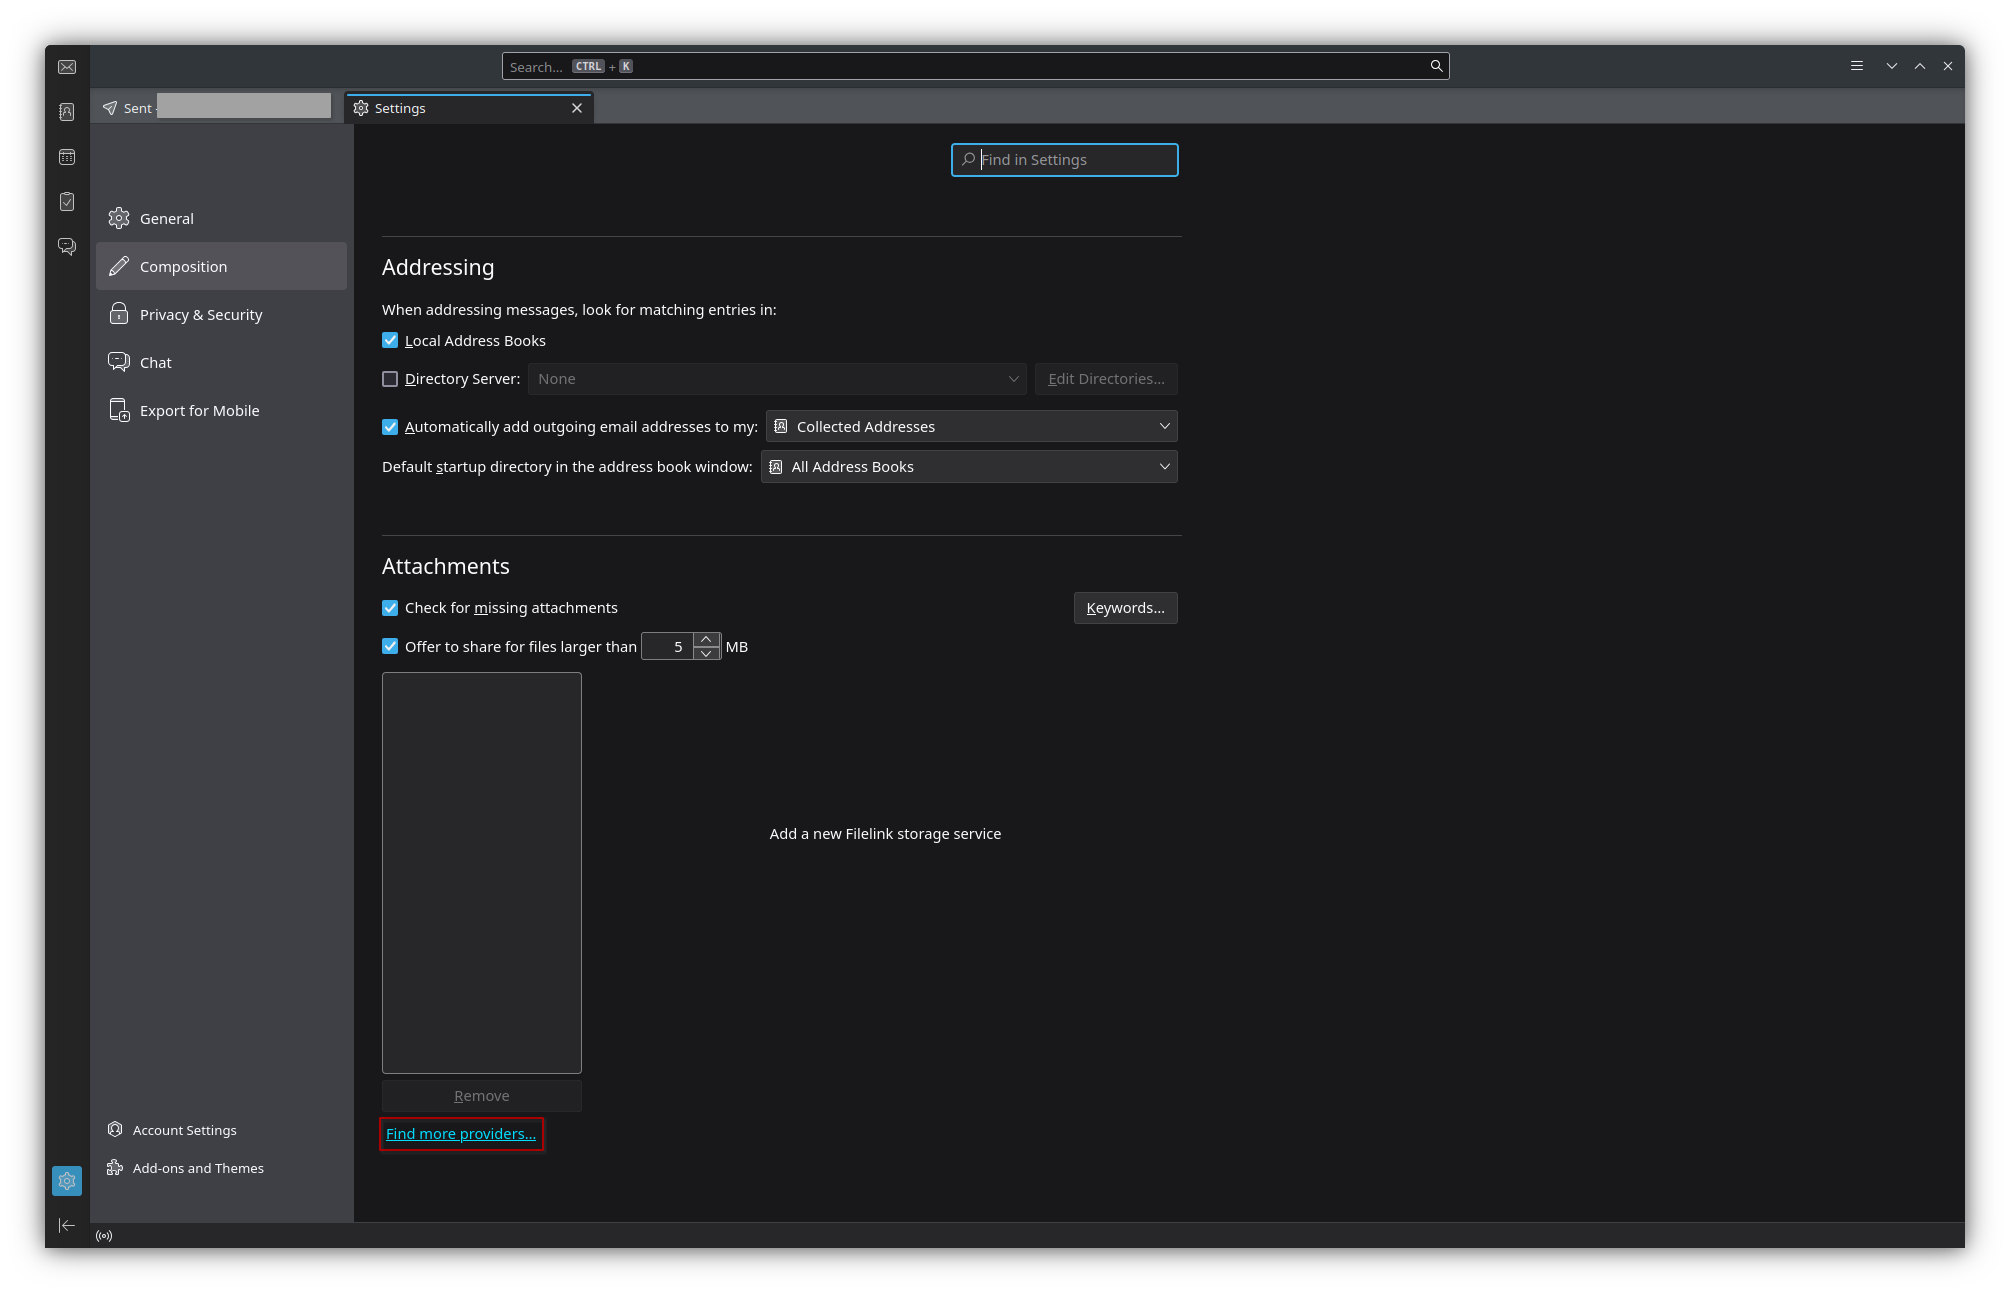
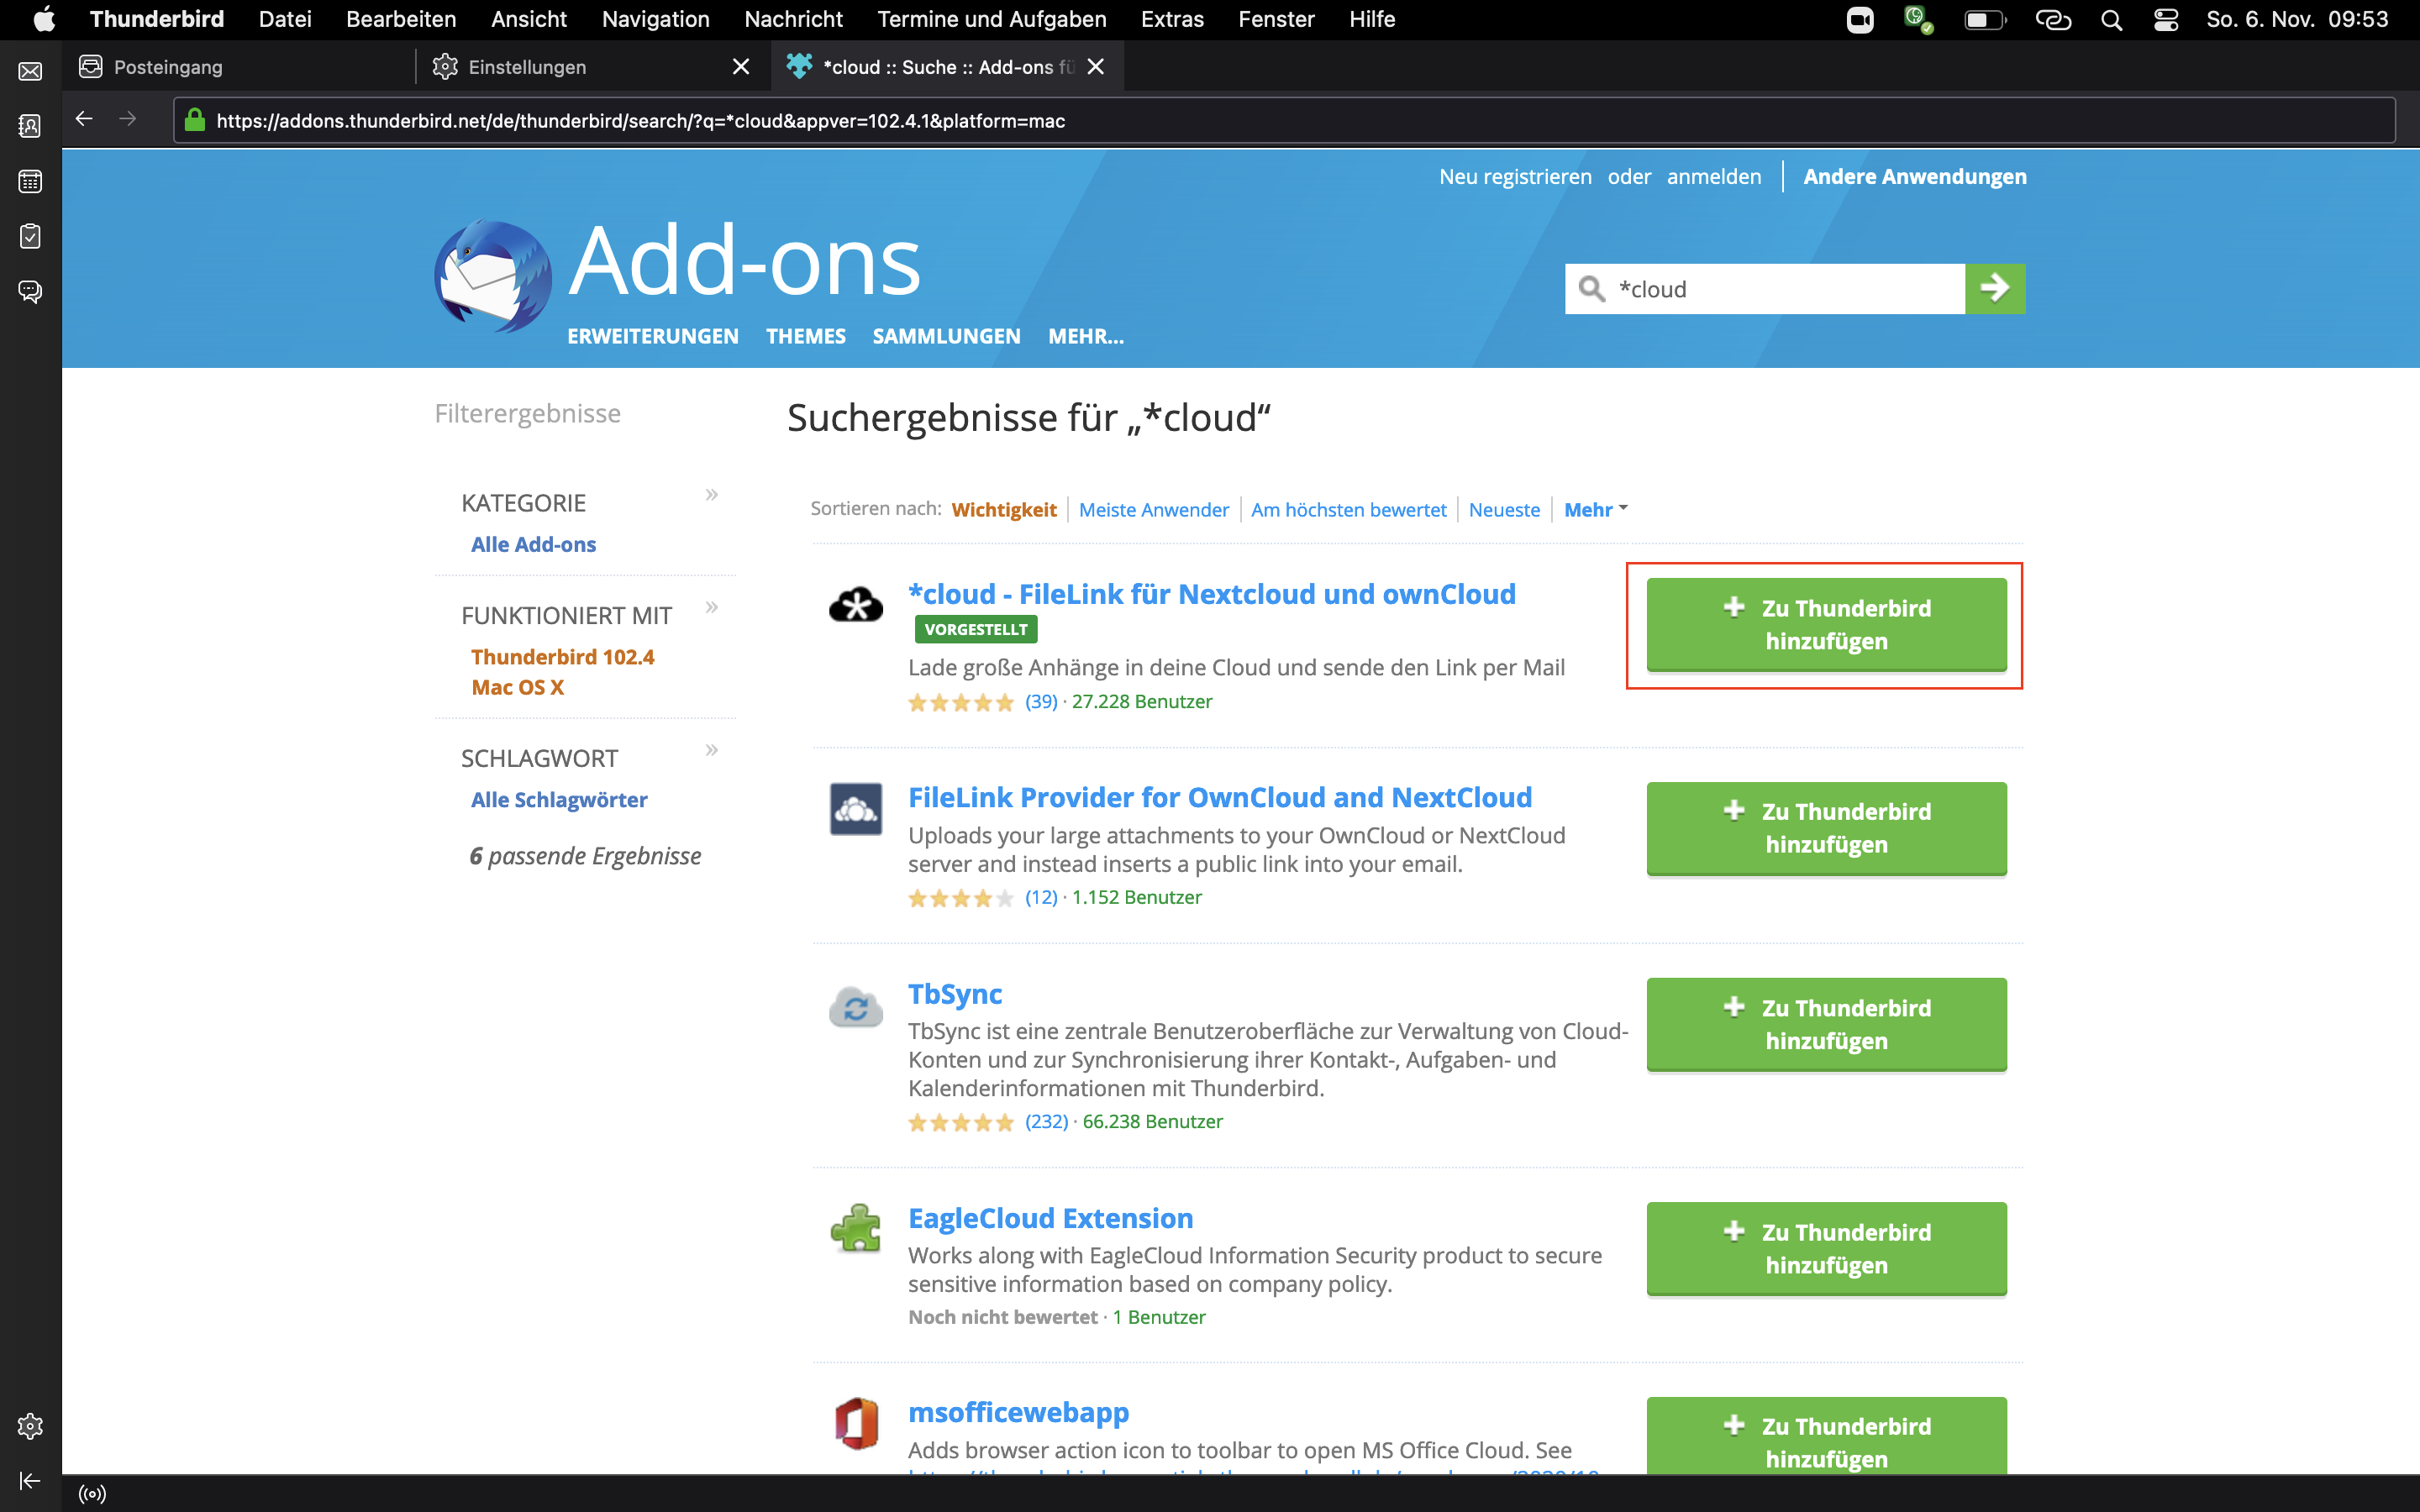
- A new tab would open, enter "*cloud “ in the search field.
- Click on “+ Add to Thunderbird. In the popup window click again on “add” and close the tab.
- Click on the newly appeared field
*Add *cloudin the Attachments section - Fill the form:
- Server URL: the URL of your institution’s Sciebo instance (e.g.
https://sciebo.uni-muenster.de) - Username: your Sciebo account
- App token or password: Your Sciebo password
- Server URL: the URL of your institution’s Sciebo instance (e.g.
- Click on
Save
Usage
When composing an e-mail, click on the drop-down menu next to " 📎Anhängen” and select Filelink -> *cloud.
Select the file you want to attach and click ‘Open’.
The selected file will now be uploaded to your Sciebo account and the recipient of your e-mail can download the file using the link.
2 - Fill file drop with scripts
Sometimes data is generated automatically somewhere and you want to move it to a specific Sciebo folder. Preferably in an automated way.
In this case, you can share the folder via a link and create a share with write permission (and password).
The link will look something like this:
https://uni-muenster.sciebo.de/s/XphYPtnTxc2MDm0 and the password could be secter. The part after the /s/ is the
username that you would use to interact with the webdav interface https://uni-muenster.sciebo.de/public.php/webdav/ and
the password is the corresponding password.
You can now send a request to the Sciebo webdav interface for example with Curl and upload a file data.csv via:
curl -u "XphYPtnTxc2MDm0:geheim" -T "daten.csv" https://uni-muenster.sciebo.de/public.php/webdav/daten.csv
Note that the webdav interface does not have an update verb (as far as we know), i.e. if you want to overwrite a file,
you must first delete the file using the following command:
curl -u "XphYPtnTxc2MDm0:geheim" -X DELETE https://uni-muenster.sciebo.de/public.php/webdav/daten.csv
3 - Forms
Hinweis
Currently, forms can only be shared with users from other universities or guests via a public link.Create a form
- Click on “New form”.
- Enter a title and description for the form.
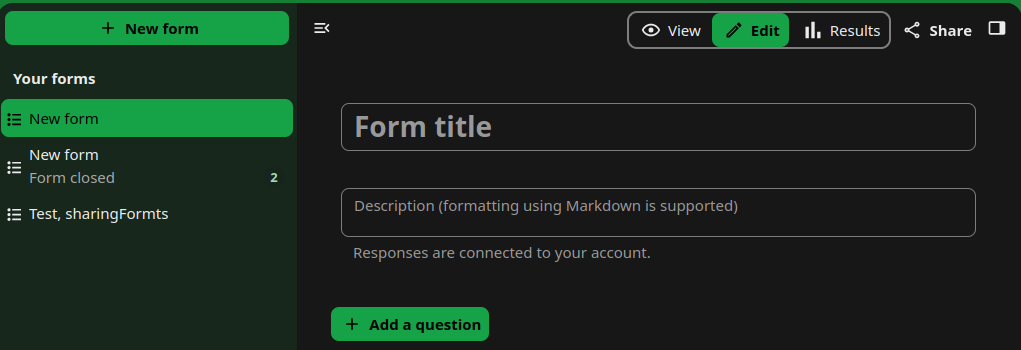
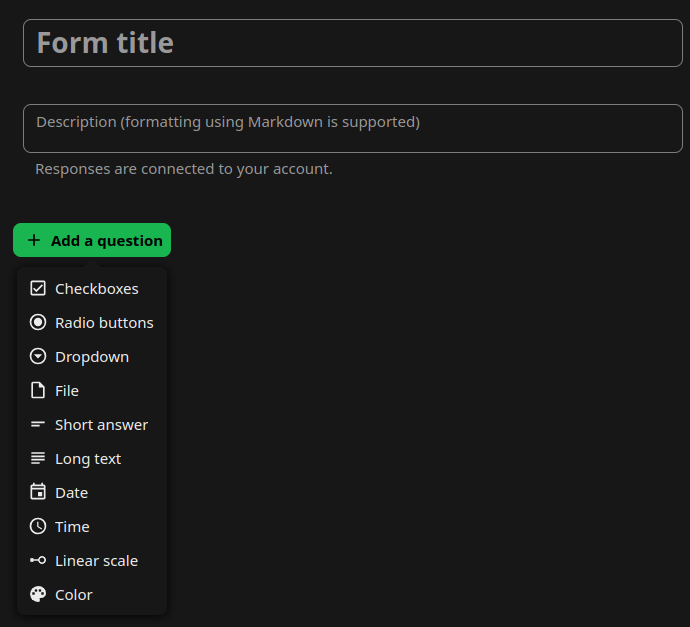
- Click on ‘Add a question’. The following options are available:
- Checkboxes
- Radio buttons
- Dropdown
- File
- Short answer
- Long text
- Date
- Time
- Linear scale
- Color
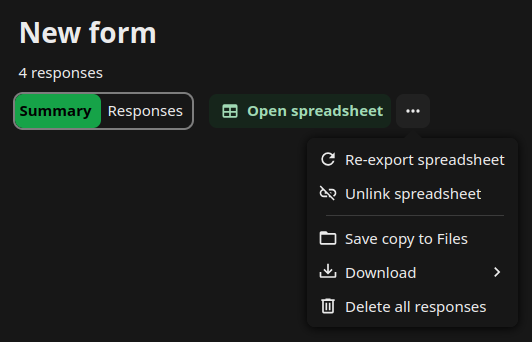
Export/download the results
In order to export the gathered data:
- Go to the form results section.
- Click on ‘Create spreadsheet’ in the opened window and choose the sciebo folder to which the spreadsheet must be saved.
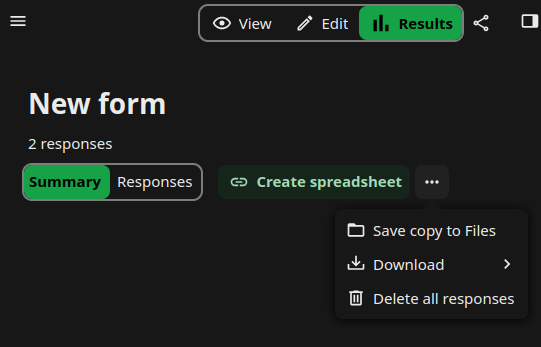
- Click on the XLSX, CSV or ODS buttons to select the file format. This will create a spreadsheet linked to the form. Note: data from forms is not automatically synced with the linked file and needs to be re-exported after new answers are added.
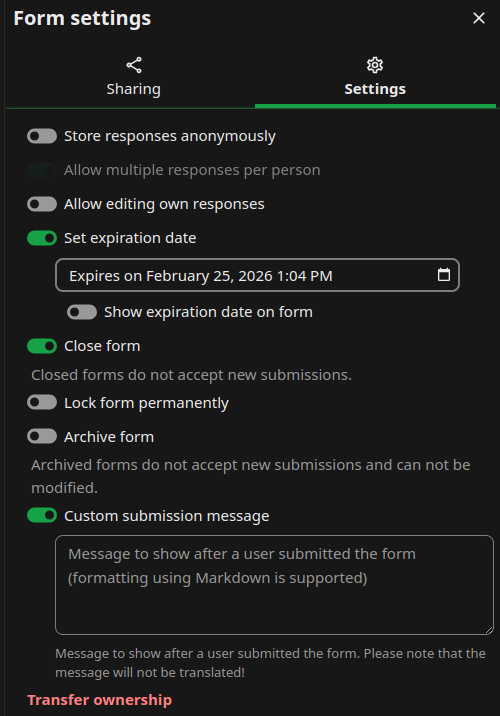
Transfer ownership
- Click on the share symbol and go to the settings tab.
- Click on ‘Transfer ownership’ at the bottom.
- In the “Select account” field, type in the account of the person to whom you want to transfer the form.
- Enter the requested text in the second field, then click “I understand, transfer this form” to confirm the transfer.
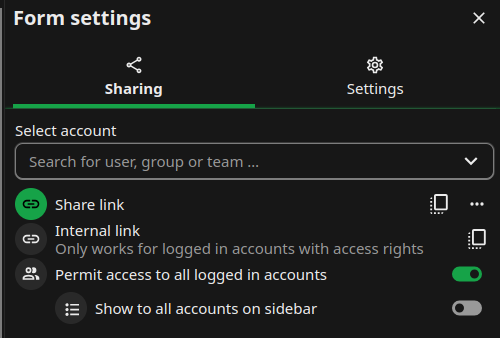
Share form
There are several options for sharing forms: Share the form via a public link.
- Share the form with specific people or teams within your institution.
- Permit access to all logged-in accounts. This option makes the form visible to everyone in your institution. You can choose to list such a form in the left menu for all users by enabling the ‘Show to all accounts on sidebar’ option.
4 - Joplin
The Joplin app allows you to create notes on your smartphone or desktop/notebook and synchronise them via sciebo. You can download the apps at https://joplinapp.org/.
To synchronize the Joplin using Sciebo go to Tools -> Options -> Synchronisation
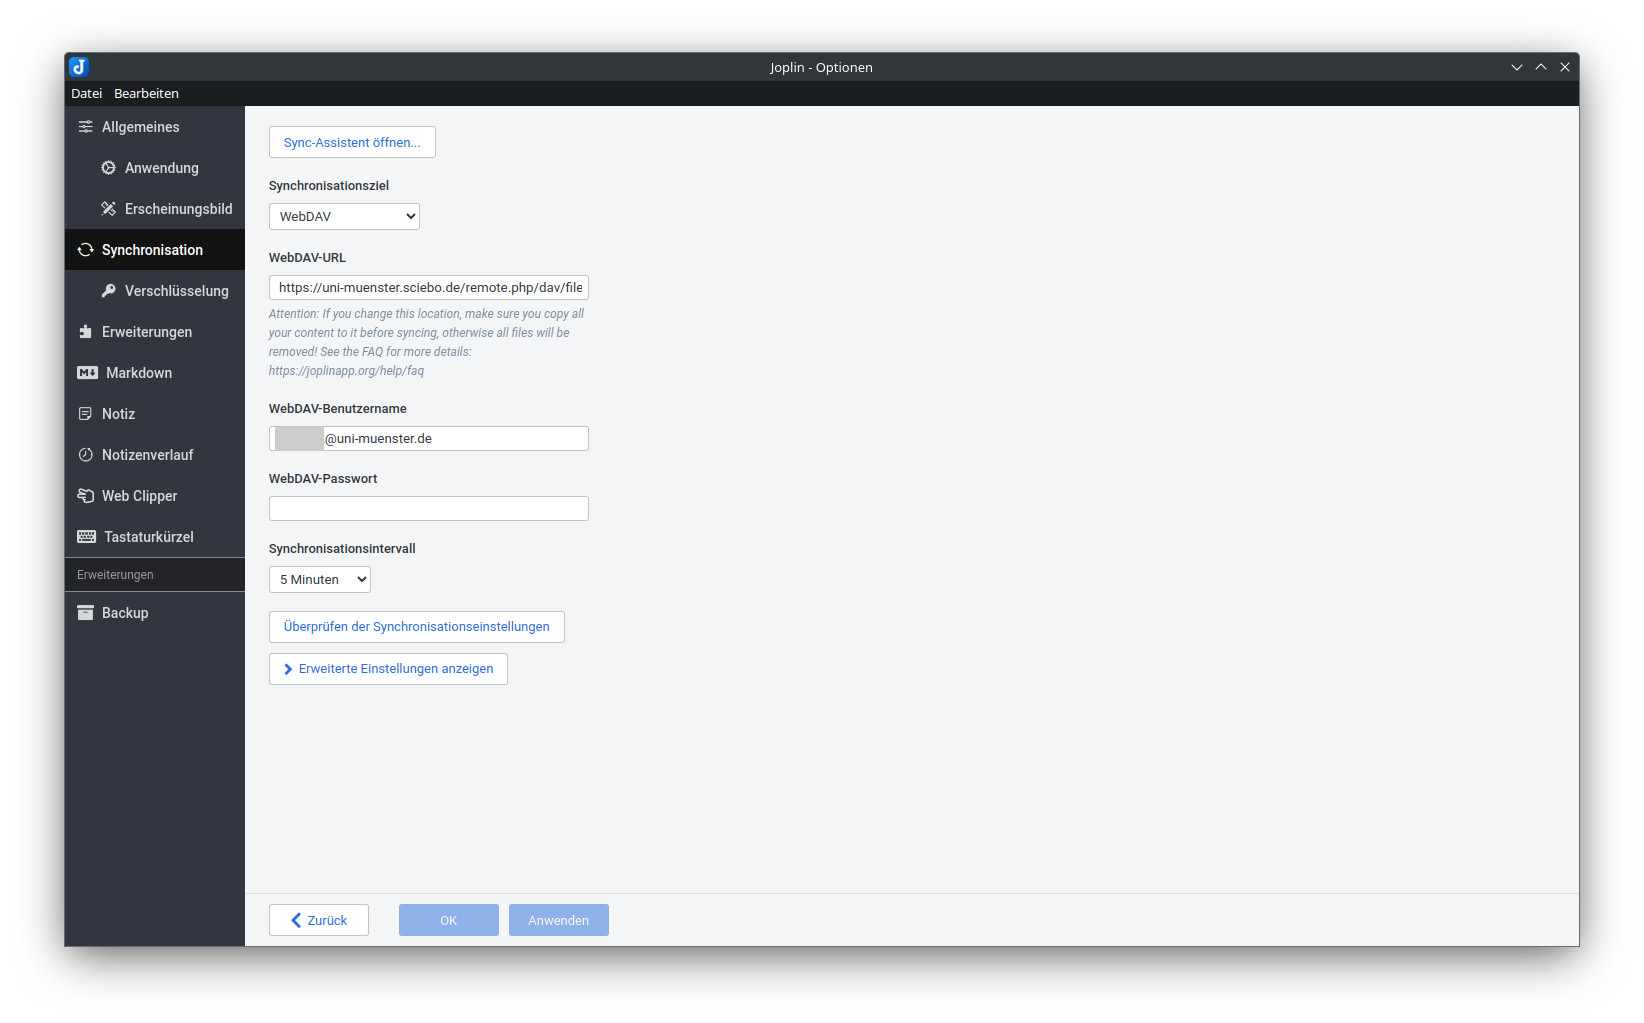
- Synchronisation target: WebDAV
- WebURL: https://your-institute.sciebo.de/remote.php/dav/files/your-sciebo-ID/Joplin where
is to be replaced by the abbreviation used by your institution, to access Sciebo via a web interface. For example for University of Münster it would be uni-muenster. - WebDAV username: your Sciebo id, for example for University of Münster it would be
username@uni-muenster.de - WebDAV password: your Sciebo password
During synchronisation, a new folder Joplin will be created in your Sciebo folder. Your Joplin notes will be stored in this folder.
5 - Obsidian
In this guide, we explain how to set up the note-taking app Obsidian. Many apps can be set up similarly.
Unfortunately, we cannot support the use of such apps with further assistance.
Attention: Obsidian is not FOSS
Obsidian is not free open source and is therefore subject to the usual security risks and conflicts of interest that come with proprietary software.
The manufacturer itself lists open-source alternatives, and we also have a guide for Joplin.
Setup
The Vault Name
By default, the Vault name will later also be the folder name in Sciebo. This can lead to conflicts. For example, if the Vault name is set to “Notes”, the Obsidian notes will be saved in the directory that is also used by the Nextcloud notes app. Therefore, these notes are also available to the editor in the web interface under the notes app.
This behavior can be changed in the settings, but this function is still marked as experimental.
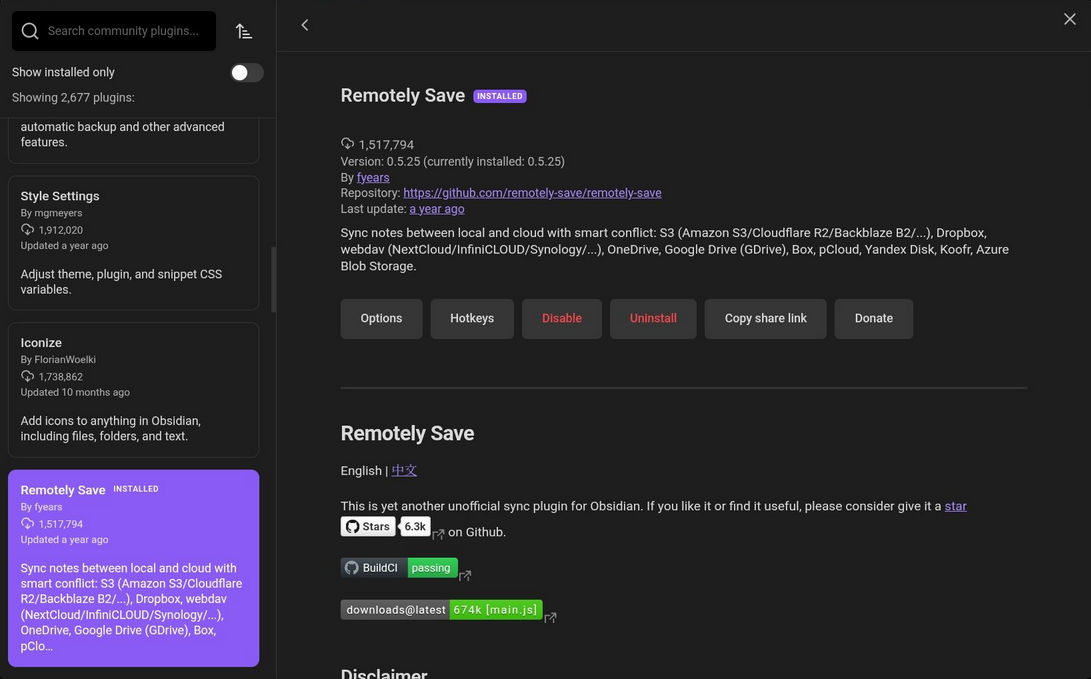
Install Community Plugin “Remotely Save”
First, community plugins need to be activated, and then the plugin “Remotely Save.”
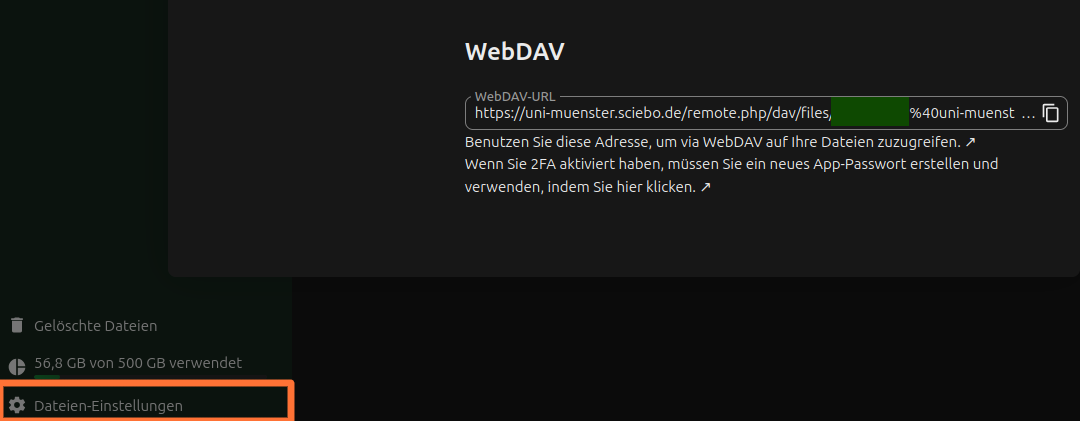
Find sciebo WebDAV Link
By clicking on “File Settings” at the bottom left of the sciebo web interface, a popup opens. There, you can copy the WebDAV address.
Generally, it has the format
https://instanzname.sciebo.de/remote.php/dav/files/kennung, where kennung is your sciebo identifier, with the @ replaced by %40.
Configure Obsidian
Finally, you need to configure Obsidian. Here, the WebDAV link from above must be entered under “Server Address.” The username and password are your regular sciebo identifier (here again with @) and your regular sciebo password.
6 - Office Integrations
Office Integrations
In sciebo we offer Collabora online for editing office documents. Link to the user manual
Screenreader with Collabora
To use a screenreader with Collabora, you have to enable it in the web interface. In the collabora interface, under the tab “help”, you have to activate the button “Voice Over”. In non-English locales this might be translated too literally, e.g. in German “Stimme Über”.
Shutdown of OnlyOffice at the end of February 2026
Since end of February 2026, sciebo is no longer offering OnlyOffice.
7 - Overleaf
Sciebo offers an integration of the collaborative LaTeX tool overleaf. This integration is based on the open source variant and its feature set is roughly between the free and basic tier of the commercial overleaf service.
We run our own overleaf instance, which can be used by all sciebo users.
The integration currently requires considerable development effort on our side and is provided as is.
In particular, we recommend to make regular backups of overleaf projects via the download function of overleaf projects, as we have only limited ability to restore singular projects.
Errorhandling
Alongside the logs there is a button on the lower right
Other logs and files, which often allows you to download a output.stdout.
This file can be opened in any text editor and often contains additional
information.
At the moment we have no working error message if folder names do not match
our restrictions (A-Za-z0-9 _-). In case of doubt use only very simple
folder names.
Sharing
In order to be able to share with a person, it first has to log into our overleaf instance via sciebo and create a new project.1
Creating new shares
Open the project you want to share.
Then there appears a Share-Button on the upper edge of the editor window.

A sharing dialog is then openend. Here you need to enter the sciebo-id of the other person. This is the id you get shown after logging into sciebo in the upper right corner. If you do not know the sciebo ID of the other person, please ask them. Often it is not their e-mail.
After entering the address, push the green share button.
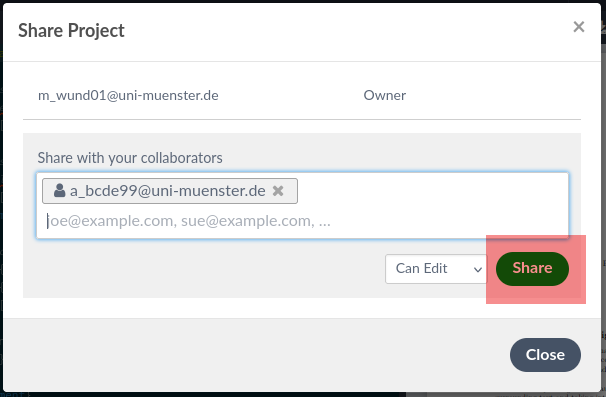
Afterwards tell the other person that you shared something with the, because our overleaf does not send out E-mails (even though it tells you it does).
Sharing with users in other sciebo instances
Note that for sharing with persons from other universities, you do not need to use the federated id, but just their local username, which is everything federated ID before the second “@”. This feature can be used for guests at https://gast.sciebo.de also.
Receiving a share
If you receive a share, there is a notification in the project overview about this.
This invitation can be accepted via “Join project” or be dismissed by a click
onto the cross.

Import and export of projects
Currently, it is sadly impossible to directly interact with the sciebo storage,
but it is possible to use .zip archives both for importing and exporting
projects.
To import a project, you click on “New Project” and use the upload option:
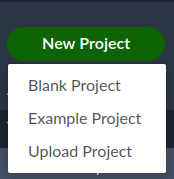
To export/download a project, you click on the small cloud symbol in the
project overview:

Known problems and non-features
- Overleaf does not send out e-mails; you have to inform share receivers by yourself
- we run Overleaf in Version 3 and are evaluation forks for our update path to Version 5. Until then we can not tell how the future feature set will look like
- sharing only works after a person logged into overleaf via sciebo at least once
- you cannot directly import from sciebo or export to sciebo
- WIP we allow for compiles beyond one minute, but the webinterface has a bug telling you after 60 seconds that it does not work. Subsequent clicks on the compile button then should return a message that a compilation is already running. If that is the case and only your initial compile takes longer than 60 seconds, you usually can still get a full compile sequent on subsequent compiles.
- WIP folder and filenames are heavily restricted; sadly if the folder name does not match the rules, no error message is being thrown. If a name is not allowed as a filename, it is also forbidden as a foldername
We are still working on the issues marked with WIP. If you experience a beahvior which differs from what we described here, please let us know.
-
To be honest we are not completely sure if it is necessary to really create a project beforehand. Logging in definitely is necessary though and when there is a project, we can be sure that a login happened. ↩︎
8 - Polls
Hinweis
Currently, surveys can only be shared with users from other universities or guests via a public link.Create a poll
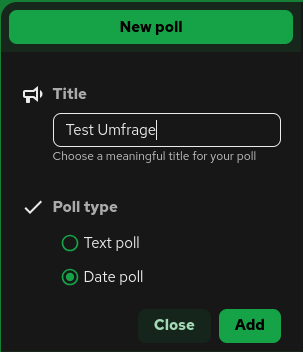
- Click on “New poll.”
- Enter a title for the poll and select a poll type (text poll/date poll).
- Click on “Add.”
- Click on “Options” in the menu on the right to add options for the poll.
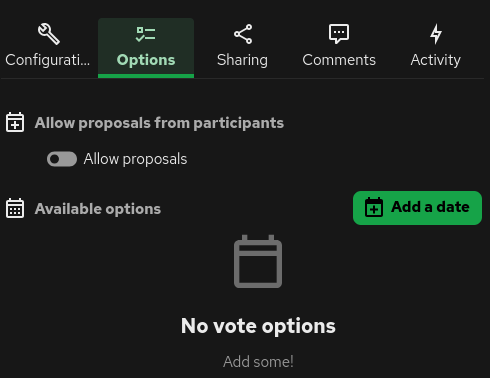
a. In the case of a date poll, there is an “Add date” button; clicking on it opens a window.
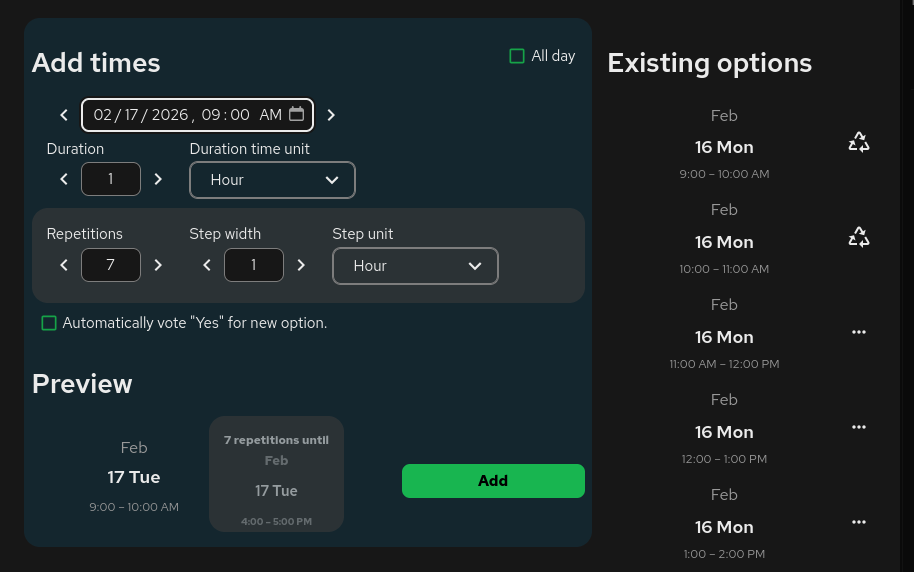
– Select the times you want to add.
- The number of repetitions determines the number of options to choose from.
- The increment defines the time between the start of each individual date.
b. In the case of a text poll, you can type the desired option in the text field from the available options.
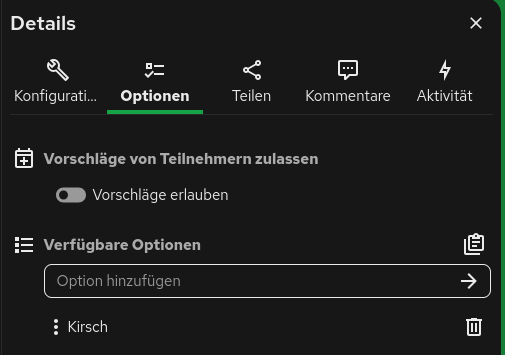
Optional: Allow suggestions from participants by activating “Allow suggestions.” When this option is activated, an option to limit the suggestion period appears.
Activate/share survey
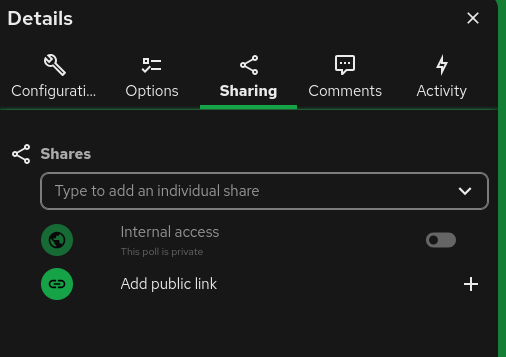
Surveys remain inactive unless you share them. There are several options for doing so:
- Share the survey via a link
- Share the survey with individual people/teams within your institution
- Activate internal access. This option makes the survey visible to everyone in your institution. Such polls are listed in the left menu under “Publicly accessible polls.” To share a poll, click Share in the right menu and select the appropriate option.
9 - Project management with deck
Notice
Currently, sharing boards with users from other universities or with guests is not possible.Deck is a project management tool that follows the Kanban principle. Thanks to the user-friendly interface, projects can be organized easily and efficiently. The following instructions will show you the first steps in using Deck.
Create boards
- Click on “Add board” in the Deck app.
- then enter the name of the board in the input field
- optionally, you can select a color scheme to visually distinguish the boards from each other
- confirm the creation by pressing “enter” or by clicking on “Save board.”
Add columns and cards.
A column is a list of cards or tasks. You create these as follows:
- enter the name of the list - e.g. “In Progress” or “To-do”—in the “List name” line.
- click on “Add list” to create the list
- to create cards for a specific column, click on the “Add card” button for the respective list.
- assign a name to the card and press the enter key.
Share boards
- click on […] next to the board name and open the “Board details.”
- click on “Share” in the top bar
- enter the account names or groups you want to share the board with.
- click on the “enter” button to add the relevant users or teams to Nextcloud.